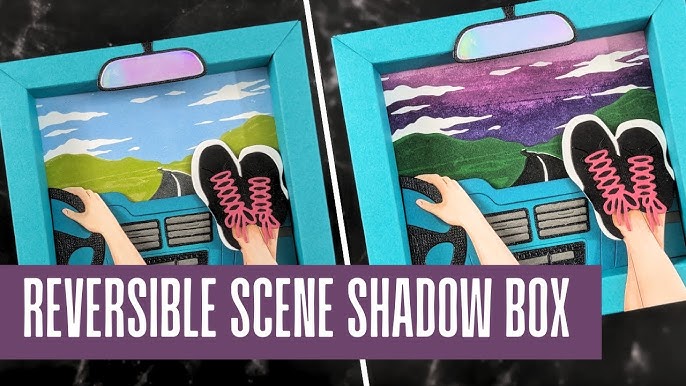
Have you ever wanted to add a unique, cozy glow to your room? Making a decorative light box is easier than you think, and it’s a fun project you can do yourself.
Imagine creating a custom piece that lights up your space just the way you like. Whether you want it for a special occasion or everyday charm, this guide will walk you through every step. By the end, you’ll have a beautiful light box that’s all yours—ready to impress and brighten any corner.
Let’s get started and bring your creativity to light!
Materials Needed
Gathering the right materials sets the stage for a beautiful decorative light box. Each item plays a key role in crafting a stunning piece. Careful selection ensures your project shines with style and charm.
Choosing The Box
Start with a box that fits your space and style. Consider size, shape, and material. Wooden or acrylic boxes work well for durability and light diffusion. Clear or frosted surfaces help spread light evenly. A deep box allows room for lights and decorations.
Selecting Lights
Pick lights that create the perfect glow. LED string lights are popular for their brightness and low heat. Battery-operated lights offer flexibility in placement. Warm white lights give a cozy feel, while colored ones add fun. Check the length to cover the entire box inside.
Decorative Elements
Choose decorations that match your theme or mood. Paper cutouts, stickers, or vinyl decals add personal flair. Small artificial flowers or ribbons create texture. Use translucent materials to let light shine through. Avoid heavy items that block light or damage the box.

Credit: www.tiktok.com
Design Planning
Start by choosing a size and shape that fits your space and style. Consider materials and lighting options to create the perfect glow. Planning details carefully helps bring your decorative light box to life.
Design planning is crucial in creating a decorative light box that stands out. It sets the foundation for your project, ensuring cohesion and aesthetic appeal. This phase involves selecting a theme, sketching layouts, and coordinating colors. Each step is vital in crafting a visually pleasing light box.Theme Selection
Choosing a theme is your starting point. It guides the overall design and influences your creative decisions. Themes can range from nature-inspired motifs to geometric patterns or modern abstract art. Consider what resonates with your style or the intended ambiance of the space. A well-chosen theme ensures your light box is visually appealing and meaningful.Sketching Your Layout
Sketching is where your ideas begin to take shape. Start by drawing rough outlines of your design on paper. Focus on placement and size of elements within the box. This step helps visualize how your theme translates into a tangible layout. Use simple shapes and lines to map out key features. Adjust and refine your sketches until you’re satisfied with the arrangement.Color Coordination
Color coordination breathes life into your design. Select colors that complement your theme and enhance the mood. Use a limited palette to maintain harmony. Consider the lighting effect; some colors may appear differently when illuminated. Experiment with combinations to find the perfect balance. Your choice of colors should unify the design and create a captivating visual experience.Preparing The Box
Preparing the box is a crucial phase in creating your decorative light box. This stage sets the foundation for a smooth and beautiful final product. Taking time to carefully clean, cut, and smooth your box will save you frustration later and give your project a professional look.
Cleaning And Priming
Start by wiping down the box thoroughly to remove any dust, dirt, or grease. A clean surface helps paint and glue stick better, making your light box more durable. Use a mild detergent and water, then let it dry completely.
Once clean, apply a primer suitable for the material of your box—wood, plastic, or metal. Primer seals the surface and prevents paint from peeling. It also enhances the colors you’ll add later, making them pop.
Cutting Openings
Think about where you want your light to shine through. Mark the areas you want to cut with a pencil or tape. Be precise—uneven cuts can ruin the look and functionality of your box.
Use the right tools, like a craft knife for cardboard or a jigsaw for wood, and cut slowly. If the edges look jagged or rough, don’t worry—you’ll smooth them next. Remember, safety first: always wear gloves and eye protection.
Sanding And Smoothing
After cutting, run sandpaper over the edges to remove splinters or rough spots. Sanding creates a clean, smooth edge that feels good to touch and looks neat. Use fine-grit sandpaper for the best finish.
Take your time here; smooth edges also help prevent the light box components from catching or tearing. Have you noticed how much a little sanding can change the feel of a project? It’s a small step that makes a big difference.

Credit: www.scribd.com
Installing Lights
Installing lights inside your decorative light box is where your project truly begins to shine—literally. This step transforms a simple box into a captivating piece of art that can brighten any space. To ensure your light box works safely and effectively, you need to focus on proper wiring, securing the lights, and testing their illumination.
Wiring Basics
Start by understanding the type of lights you want to use. LED strip lights are popular because they are energy-efficient and easy to install. Make sure your power source matches the voltage requirements of your lights to avoid any electrical issues.
Keep your wires organized by using cable clips or adhesive-backed holders. This prevents tangling and keeps your box neat inside. Also, remember to leave some extra wire length to make future adjustments easier.
Securing The Lights
Once your wiring is ready, it’s time to fix the lights inside the box. Use double-sided tape or small mounting brackets to hold LED strips firmly in place. Avoid using glue that can damage the lights or make future repairs difficult.
If you’re working with individual bulbs, consider small sockets or light holders to keep them stable. Make sure the lights are evenly spaced to create a balanced glow. Have you ever noticed how uneven lighting can make a display look amateur? This step helps you avoid that.
Testing Illumination
Before sealing your box, plug in the lights to test their brightness and coverage. Check for any dark spots or flickering, which can indicate loose connections. Adjust the lights or wiring as needed to get consistent illumination.
Take a moment to view your light box from different angles and in various lighting conditions. This will help you decide if you need to add more lights or diffuse the glow for a softer effect. Don’t rush this step—testing can save you from disappointing results later.
Adding Decorative Touches
Adding decorative touches to your light box brings it to life. It creates a unique style that matches your space. Small details make a big difference in appearance.
Choose decorations that fit your theme and personal taste. Use colors, patterns, and textures to enhance the light box’s charm. These creative steps help you turn a simple box into a beautiful art piece.
Painting Techniques
Painting adds color and personality to the light box. Use acrylic or spray paint for an even finish. Try different techniques like sponging or dry brushing for texture.
Stencil patterns create neat designs without much effort. Paint the edges in a contrasting color to frame the box. Let each layer dry before adding more paint to avoid smudges.
Applying Decals Or Stickers
Decals and stickers offer quick decoration options. Choose waterproof and fade-resistant types for durability. Place them carefully to avoid air bubbles or wrinkles.
Combine different sizes and shapes for a playful look. Use clear or frosted decals to maintain some light glow. Peel off the backing slowly and press firmly for best results.
Incorporating Natural Elements
Natural items add warmth and texture to your light box. Use dried flowers, leaves, or small twigs for an organic feel. Glue them gently on the surface or inside the box frame.
Shells and stones work well for a beach-themed design. Seal natural elements with a clear varnish to protect them. These touches bring nature’s beauty into your decor.
Finishing And Displaying
Finishing and displaying your decorative light box brings your project to life. It enhances durability and showcases your design beautifully. This stage ensures your light box stays bright and attractive for a long time. Proper finishing protects the materials and adds a polished look. Displaying it in the right spot highlights its charm and creates the perfect ambiance.
Sealing And Protecting
Apply a clear sealant to protect the surfaces from dust and moisture. Choose a sealant suitable for wood, paper, or plastic, depending on your materials. Use a brush or spray for an even coat. Let it dry completely before handling. Avoid thick layers to prevent cloudiness on transparent parts. This step extends the life of your light box and keeps it looking fresh.
Placement Ideas
- Place on shelves to add soft lighting to a room.
- Use as a night light in bedrooms or hallways.
- Set near plants for a cozy, natural vibe.
- Position on desks to brighten workspaces.
- Hang on walls with hooks for stylish decor.
Choose spots where the light box can be seen and enjoyed. Avoid direct sunlight to prevent fading. Consider areas where the glow enhances the mood.
Maintenance Tips
- Clean gently with a soft, dry cloth regularly.
- Avoid harsh chemicals that might damage the sealant.
- Check batteries or cords to ensure steady lighting.
- Store in a dry place if not in use for long.
- Inspect for any damage and repair quickly.
Regular care keeps your light box bright and beautiful. Small efforts make a big difference in longevity.
Creative Variations
Creative variations can transform a simple decorative light box into a unique piece that fits your style and mood. You can easily adapt your design to celebrate different occasions or express personal messages. The possibilities encourage you to experiment and think beyond the basic setup.
Seasonal Themes
Changing your light box to match the seasons adds charm and relevance to your space. Think about using autumn-colored paper backgrounds or snowflake cutouts for winter. You might swap in flowers and bright colors for spring or beach-themed shapes during summer.
Seasonal themes invite you to refresh your light box regularly, keeping your décor lively and interesting. Have you tried using natural elements like leaves or pine cones for a more authentic touch? These small details can make a big difference in creating a cozy atmosphere.
Personalized Messages
Adding words or phrases to your light box makes it a powerful way to communicate. You can display motivational quotes, celebrate birthdays, or simply share a warm greeting with guests. Using different fonts or colors highlights your message and adds personality.
Think about how often you see a light box with your name or a favorite saying—it instantly feels special. Have you considered updating your message to reflect your mood or upcoming events? This keeps your light box engaging and meaningful.
Using Different Light Types
The type of light you use affects the mood and impact of your light box. LED strips offer flexibility and bright, even lighting, while fairy lights create a softer, magical glow. Battery-operated lights provide freedom to place your box anywhere without worrying about cords.
Experimenting with colored bulbs or dimmable options lets you adjust the ambiance easily. Do you prefer warm tones for relaxation or cool tones to boost focus? Your choice of lighting can completely change how your decorative light box feels in a room.

Credit: www.tiktok.com
Frequently Asked Questions
What Materials Do I Need For A Decorative Light Box?
You need a shadow box frame, LED strip lights, decorative paper, glue, and scissors. These materials are easy to find and affordable.
How Do I Install Led Lights Inside The Box?
Attach the LED strip lights along the box edges using adhesive backing. Connect the power source carefully for safe use.
Can I Customize The Design Of My Light Box?
Yes, you can use patterned paper, stickers, or cutouts to personalize your light box. Creativity is key.
How Long Does It Take To Make A Light Box?
It typically takes 30 to 60 minutes, depending on design complexity. Preparation and drying time may vary.
Conclusion
Creating a decorative light box is a fun and simple project. It adds charm and light to any room. You can customize it with colors and designs you love. Using easy materials keeps the process stress-free. Enjoy the warm glow it brings to your space.
Try making one today and brighten your home. Crafting can be relaxing and rewarding. Light up your creativity and share your art with friends.