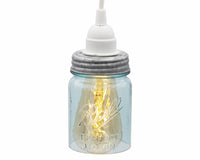
Have you ever looked at a simple decorative jar and wondered how to turn it into something truly special? Imagine transforming that jar into a beautiful pendulum light that adds charm and warmth to your space.
It’s easier than you think, and you don’t need to be an expert. In this guide, you’ll discover step-by-step how to create your own unique lighting piece that will impress your friends and brighten your home. Ready to bring new life to your decor?
Let’s get started!

Credit: masonjarlifestyle.com
Choosing The Right Jar
Choosing the right jar is key to creating a beautiful pendulum light. The jar sets the tone and style of your light fixture. It needs to balance both function and design. Picking the perfect jar ensures your light looks stunning and works well.
Glass Types And Shapes
Clear glass shows the light bulb clearly. It creates a bright, clean look. Frosted glass softens the light for a cozy feel. Colored glass adds mood and style. Shapes vary from round to square or hexagonal. Tall jars create a dramatic effect. Short, wide jars spread light broadly. Think about the mood and style you want.
Size Considerations
The jar size affects light and space. Large jars hold bigger bulbs and create more light. Small jars suit compact spaces or subtle lighting. Consider the height of the ceiling too. A heavy jar needs strong support for safety. Choose a jar size that fits your room and lighting needs.
Design And Color Options
Simple designs fit modern or minimal styles. Intricate patterns suit vintage or rustic looks. Clear or colored glass changes the light tone. Bright colors add energy to the room. Soft colors create calm and warmth. Pick a design and color that match your decor and mood.
Gathering Materials
Transforming a simple decorative jar into a pendulum light is an exciting DIY project that adds character to any room. Before you dive into the creative process, it’s crucial to gather the right materials. This step ensures a smooth and successful transformation, allowing your vision to come to life without unexpected hurdles. So, what exactly do you need to get started?
Lighting Components
To create your pendulum light, you’ll need a few basic lighting elements:
- Light bulb socket:Choose a socket that matches the style and size of your jar. Ensure it fits snugly inside the jar opening.
- Light bulb:Opt for an LED bulb to reduce heat and energy consumption. Consider the bulb’s brightness to achieve your desired ambiance.
- Electrical cord:A cord with an inline switch can be practical, allowing you to control the light easily.
- Ceiling mount kit:If you plan to hang your light from the ceiling, ensure the mount kit is compatible with your electrical setup.
Tools Needed
Having the right tools at hand is essential for a hassle-free DIY experience. You’ll need:
- Drill:A drill is useful for making holes in the jar lid or base for the electrical components.
- Screwdriver:Choose a screwdriver that matches the screws in your light fixture kit.
- Wire stripper:Necessary for preparing electrical wires to connect the bulb socket.
- Measuring tape:This helps ensure your cord is the right length for your space.
Safety Gear
Protecting yourself during the project is paramount. Consider using:
- Safety glasses:These shield your eyes from debris when drilling or cutting.
- Gloves:Wear gloves to protect your hands from sharp tools or glass edges.
- Dust mask:This is essential when working with glass or drilling to prevent inhalation of dust particles.
Are you ready to start gathering these materials? Each element plays a crucial role in ensuring the safety and success of your project. With everything in place, you’re one step closer to creating a unique light fixture that showcases your DIY prowess. Remember, preparation is the key to creativity. Now, let your creativity shine!
Preparing The Jar
Preparing the jar is a crucial step to ensure your pendulum light looks professional and functions safely. Taking the time to clean, drill, and smooth the jar properly can make a big difference in the final look and durability of your project. Let’s break down these essential tasks so your jar is ready to shine.
Cleaning And Drying
Start by thoroughly washing the jar with warm, soapy water. Remove any labels or sticky residue using rubbing alcohol or a gentle adhesive remover. This prevents dirt or oils from interfering with the paint or light fixture you’ll add later.
Once clean, dry the jar completely. Moisture inside the jar can cause electrical problems or rust the metal parts of your light. Leaving it to air dry overnight is often the safest bet.
Drilling The Hole
Creating a hole for your wiring is the next step, but it requires patience and care. Use a glass drill bit designed for fragile materials to avoid cracking. Mark the spot where you want the hole, usually near the base or side of the jar.
Apply gentle pressure and keep the drill bit cool by dipping it in water frequently. If you rush, the jar might shatter, so take breaks and stay calm. Have you ever tried drilling glass? It demands a steady hand and respect for the material.
Smoothing Edges
After drilling, the edges around the hole can be sharp and dangerous. Use fine-grit sandpaper or a diamond sanding block to smooth the rim carefully. This step protects your wiring from fraying and prevents cuts when handling the jar.
Run your fingers around the hole to check for rough spots. If you feel any sharp points, keep sanding gently. A smooth edge is essential for both safety and a polished appearance.
Wiring The Light
Wiring the light is a crucial part of turning your decorative jar into a pendulum light. This process involves selecting the right bulb and socket, carefully threading the cord, and securing the socket safely inside the jar. Proper wiring ensures the light works well and stays safe for use.
Selecting The Bulb And Socket
Choose a bulb that fits the size and style of your jar. LED bulbs are a good choice because they stay cool and use less energy. Pick a socket that matches the bulb type and has a cord long enough for your needs. A simple pendant socket works best for this project.
Threading The Cord
Thread the power cord through the jar’s opening or a hole you made. Make sure the cord moves freely and does not get pinched. Leave extra length at both ends for easy connection and hanging height adjustment. Keep the cord straight to avoid damage.
Securing The Socket
Secure the socket inside the jar to prevent it from moving. Use a strong adhesive or mounting ring designed for light fixtures. Check that the socket is stable and the bulb hangs in the center of the jar. This keeps the light even and safe to use.
Adding Decorative Elements
Adding decorative elements transforms a simple jar into a stunning pendulum light. These touches give your light a unique style and personality. You can choose from painting, etching, embellishments, or lighting options.
Each option lets you customize the jar to fit your room’s mood and design. Creativity is key. Small details make a big impact on the final look.
Painting And Etching
Painting jars adds color and patterns easily. Use glass paint or spray paint for smooth coverage. Light colors brighten the space. Dark colors add drama and depth.
Etching creates frosted or textured effects. Use etching cream or a stencil to carve designs. This technique softens the light and adds elegance. Combine painting and etching for a layered look.
Adding Embellishments
Embellishments bring extra charm and texture. Glue ribbons, lace, or twine around the jar neck. Attach small charms, beads, or buttons for detail.
Try natural elements like dried flowers or leaves for a rustic vibe. Metallic stickers or gems add sparkle. Mix and match materials for a personal touch.
Using Led Strips Or Fairy Lights
LED strips wrap neatly inside or outside the jar. They provide bright, even light and come in many colors. Choose warm white for cozy lighting.
Fairy lights create a magical, twinkling effect. Place them loosely inside for a soft glow. Battery-powered lights offer easy installation without wires.
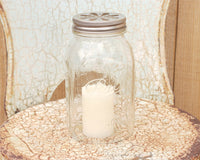
Both options are energy-efficient and safe. They enhance the jar’s look and make the space inviting.
Credit: masonjarlifestyle.com
Assembling The Pendulum Light
Assembling the pendulum light transforms a simple jar into a stylish lighting fixture. This process involves securing the jar, adjusting the cord length, and ensuring the light works perfectly. Follow these steps carefully for a beautiful and safe pendulum light.
Attaching The Jar To The Cord
Start by fixing the jar to the light cord. Use a metal or plastic ring that fits the jar’s opening. Slide the ring over the cord and tighten it to hold the jar firmly. Make sure the jar is stable and will not slip off.
If the jar has a lid, remove it before attaching. Secure the cord and socket inside the jar carefully. This setup keeps the bulb safe and the jar balanced.
Adjusting Length And Position
Decide how low the pendulum light should hang. Shorten or lengthen the cord by pulling it through the ceiling mount. Use a cord grip or clamp to hold the length steady.
Check that the jar hangs straight. Adjust its position to avoid tilting. A level light looks neat and spreads light evenly.
Testing The Light
Insert the bulb into the socket inside the jar. Connect the cord to a power source. Turn the light on to check if it works.
Look for any flickering or loose parts. Ensure the jar does not heat up too much. If everything is fine, the pendulum light is ready to brighten your space.
Installing The Pendulum Light
Installing your decorative jar pendulum light is where your creativity meets functionality. This step transforms your crafted jar into a stunning focal point that brightens your space. Paying attention to the installation details ensures your light is both beautiful and safe.
Choosing The Location
Pick a spot where your pendulum light can shine without obstruction. Consider areas like over a dining table, in a cozy reading nook, or near an entryway to add charm. Think about the light’s purpose—do you want it to create ambiance or provide task lighting?
Also, check the ceiling height. Your jar light should hang at eye level or just above to avoid bumps but still catch attention. Is there an existing electrical box, or will you need additional wiring? These questions help avoid surprises during installation.
Mounting Hardware
Use sturdy mounting hardware that matches your ceiling type—drywall anchors for plaster ceilings or toggle bolts for drywall. The weight of your jar light matters here; make sure the hardware supports it comfortably. Don’t guess the weight; weigh your jar with the bulb and fitting before buying hardware.
- Choose a ceiling hook or mounting bracket rated for your light’s weight.
- Use a drill and appropriate screws to secure the bracket firmly.
- Double-check that the mounting is level to keep your pendulum straight.
Once, I underestimated my jar’s weight and used light-duty anchors. The pendulum tilted badly, ruining the look. A solid mount saves you from headaches later.
Safety Checks
Before powering your light, inspect all electrical connections for tightness and proper insulation. Loose wires can cause flickering or worse, electrical hazards. Use a voltage tester if you’re unsure about the wiring setup.
Confirm that your bulb’s wattage matches the fixture’s rating to prevent overheating. Also, ensure the jar material is heat-resistant or has enough ventilation to avoid melting or fire risks. Have you ever felt hesitant about wiring? Don’t hesitate to call a professional if you’re uncertain.
Safety is not just about rules; it’s about protecting your home and loved ones. Taking these precautions makes your decorative pendulum light a safe and stunning feature for years to come.
Maintenance Tips
Keeping your decorative jar pendulum light in top shape ensures it stays a stunning focal point in your space. Regular maintenance not only preserves its beauty but also guarantees safety and optimal performance. Here’s how you can care for your light with simple, effective tips.
Cleaning The Jar
Dust and fingerprints can dull the glass of your jar, so cleaning it regularly is key. Use a soft cloth and mild glass cleaner or a mixture of water and vinegar for a streak-free shine. Avoid abrasive materials that could scratch the surface.
Remove the jar from its fixture before cleaning to prevent damage to electrical parts. Have you noticed how much brighter the light looks after a thorough cleaning? It’s a small step that makes a big difference.
Replacing Bulbs
Choosing the right bulb is important for both look and function. Check the wattage limits specified for your pendulum light to avoid overheating. LED bulbs are a great choice—they last longer and use less energy.
Turn off the power and let the bulb cool before replacing it. Keep spare bulbs handy so you’re never left in the dark. What kind of lighting mood do you want to create next time you swap a bulb?
Troubleshooting
If your pendulum light flickers or doesn’t turn on, first check the bulb and power source. Loose connections are often the culprit, so ensure all wiring is secure. If issues persist, consult a professional to avoid electrical hazards.
Sometimes the problem is as simple as a dirty socket or a tripped circuit breaker. Have you ever found a quick fix by just tightening a connection? Those small moments save time and frustration.

Credit: www.theotheraesthetic.com
Frequently Asked Questions
What Materials Are Needed For A Jar Pendulum Light?
You need a decorative jar, pendant light kit, bulb, drill, and hanging hardware. Choose a jar that suits your style. Ensure the light kit fits the jar opening for easy installation.
How Do You Safely Drill A Hole In A Glass Jar?
Use a diamond-tipped drill bit and drill slowly with water cooling. Wear safety goggles and gloves. Mark the spot before drilling to maintain accuracy and prevent cracks.
Can Any Jar Be Converted Into A Pendulum Light?
Most glass jars work, but thick or colored glass may need special care. Avoid plastic jars as they can melt or deform. Clear or translucent jars provide the best light diffusion.
What Type Of Bulb Is Best For Jar Pendulum Lights?
Use LED bulbs for energy efficiency and low heat emission. Choose soft white or warm light for a cozy ambiance. Ensure the bulb size fits inside the jar comfortably.
Conclusion
Creating a pendulum light from a decorative jar is simple and fun. It adds charm and style to any room. Just follow the steps carefully to stay safe. Use materials you already have for a unique touch. This DIY project brightens your space and shows your creativity.
Enjoy the warm light and personal feel it brings. Try different jars and bulbs for new looks. Small changes can make a big difference in your home. Give it a go and see how easy it is!