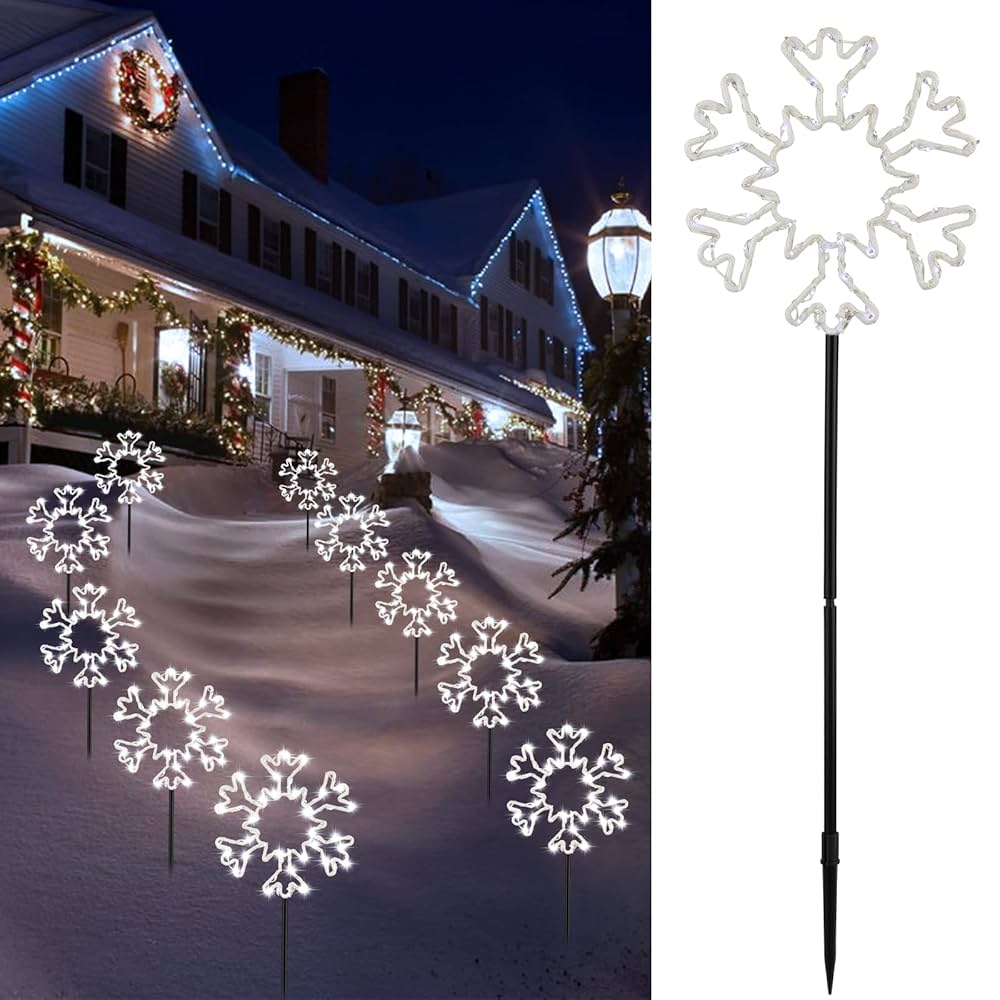
Are you looking to add a magical touch to your outdoor space this winter? Imagine your trees glowing with beautiful snowflake lights that create a warm, festive atmosphere for your home.
Making snowflake outdoor tree lighted decorations is easier than you think. In this guide, you’ll discover simple steps to transform your yard into a winter wonderland. Keep reading, and you’ll learn how to create stunning decorations that will impress your neighbors and bring joy to your family all season long.
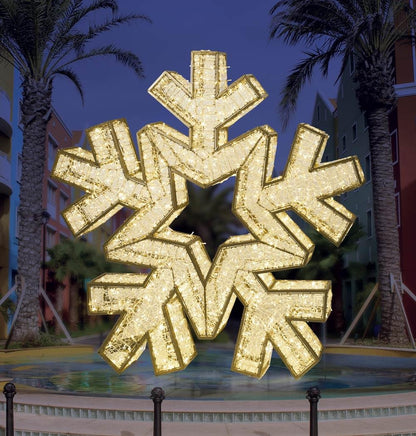
Credit: commercialchristmassupply.com
Materials Needed
Gathering the right materials is key to creating stunning snowflake outdoor tree lighted decorations. Each component plays a role in durability, safety, and visual appeal. Knowing exactly what you need helps avoid last-minute trips to the store and keeps your project on track.
Choosing The Right Lights
Pick LED string lights for energy efficiency and long-lasting brightness. White or cool blue lights often mimic the icy glow of snowflakes best. Make sure the lights are rated for outdoor use to withstand weather conditions.
Consider the length and bulb size. Mini lights are subtle, while larger bulbs create a bold statement. Also, check if the lights have a steady or twinkling mode—your choice will affect the overall vibe of your decoration.
Selecting Frame Materials
The frame shapes your snowflake and supports the lights. Use sturdy but lightweight materials like PVC pipes or metal wire to build your frame. PVC is easy to cut and assemble, while metal wire offers more flexibility for intricate designs.
Think about weather resistance—metal frames should be rust-proof or coated. Your frame should be strong enough to hold the lights firmly without sagging. Have you tried bending wire to find the perfect snowflake pattern? It’s a simple way to test your design before final assembly.
Additional Supplies
Besides lights and frame, you’ll need zip ties or waterproof tape to secure lights onto the frame. A power extension cord rated for outdoor use is essential if your decoration is far from an outlet. Also, gloves and safety glasses can protect your hands and eyes during assembly.
Don’t forget a ladder or sturdy step stool to reach higher tree branches safely. Planning your setup with all these supplies on hand saves frustration and keeps your decorating experience enjoyable.
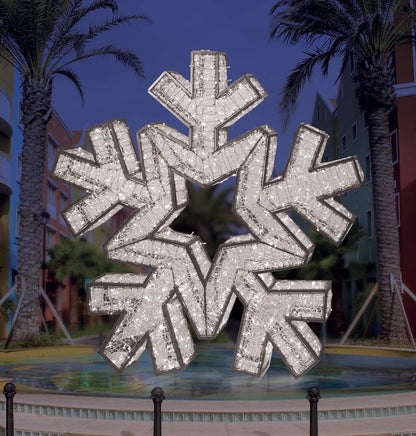
Credit: commercialchristmassupply.com
Designing Your Snowflake
Create a bright and festive look by shaping lights into a snowflake design on your outdoor tree. Use string lights and wire to form the pattern, securing them firmly. This simple decoration adds charm and warmth to any outdoor space during winter.
Creating stunning snowflake outdoor tree lighted decorations is an exciting way to bring festive cheer to your garden. Designing your snowflake is a crucial step in achieving an eye-catching display. It’s not just about picking shapes and sizes; it’s about envisioning how your creation will sparkle amidst the winter wonderland.Basic Snowflake Shapes
Snowflakes come in countless shapes and sizes, but starting with basic designs will help you craft beautiful decorations. Consider simple geometric patterns like hexagons and triangles. These shapes are easy to replicate and arrange symmetrically. You might think simple equals boring, but these basic shapes allow for creativity. You can layer them, twist them, or combine them to create intricate snowflake patterns. Imagine the joy of seeing your unique design light up with the first snowfall!Scaling For Tree Size
The size of your snowflakes should complement your tree, enhancing its natural beauty. If your tree is grand and tall, larger snowflakes will stand out beautifully. They won’t get lost amidst the branches and will catch everyone’s attention. On the other hand, smaller trees benefit from more delicate snowflake designs. Smaller snowflakes can be arranged in clusters or cascades, creating a whimsical effect. Ask yourself—how do you want your tree to look from a distance? Scaling your snowflake designs accordingly will make all the difference. Personal experience has taught me that balance is key. One winter, I made snowflakes too large for my modest-sized tree, and they overwhelmed its charm. Remember, the right scale will enhance your tree’s natural allure, not overshadow it.Building The Frame
Building the frame is the foundation of your snowflake outdoor tree lighted decoration. A sturdy and well-crafted frame ensures your design holds its shape against wind and weather. It also makes the decorating process smoother and safer.
Cutting And Shaping Materials
Start by choosing materials that are both lightweight and durable, like PVC pipes or thin metal rods. These materials are easy to cut and bend into the sharp angles typical of a snowflake design.
Use a fine-toothed saw or pipe cutter for clean edges. Take precise measurements to ensure symmetry—snowflakes are all about balance. Try sketching your design on paper first to visualize each piece before cutting.
Have you ever struggled with uneven cuts? Using a simple miter box can make all the difference. It keeps your cuts straight and your angles perfect, saving time and frustration.
Assembling The Structure
Lay out all your cut pieces on a flat surface matching your snowflake pattern. This lets you see how everything fits before you start attaching parts. It’s easier to fix mistakes early than after assembly.
Secure joints with waterproof glue, zip ties, or small screws depending on your material. Make sure connections are tight but allow a little flexibility to absorb wind movement. This will help prevent cracks or breaks.
Consider adding a central hub—like a circular piece of wood or plastic—to connect all arms. It adds strength and keeps the design stable. How will you ensure your frame stays steady on your tree? Think about anchor points or hooks for easy mounting.
Wiring The Lights
Wiring the lights on your snowflake outdoor tree decorations is where your vision truly comes to life. It’s about more than just plugging in strings of lights; it requires careful planning and attention to detail to ensure your display shines brightly and safely throughout the season.
Planning Light Placement
Start by mapping out where each string of lights will go on your snowflake frame. Consider the shape and size of the tree and snowflake design to avoid overcrowding or gaps. Visualizing the pattern helps you decide how many lights you need and prevents last-minute adjustments.
Think about power sources too. Will your extension cords reach easily? Can you hide plugs to keep the display neat? Asking these questions now saves frustration later.
Securing Lights To Frame
Use zip ties or twist ties to attach the lights firmly to your frame. This prevents them from sagging or shifting in the wind. Wrap ties snugly but not too tight—you don’t want to damage the wires.
Try to space the lights evenly to highlight the snowflake’s intricate shape. If the frame is metal, electrical tape can provide extra grip and protect the wiring. Have you noticed how loose lights can ruin the whole look? Taking time here pays off visually.
Ensuring Weatherproof Connections
Outdoor displays face rain, snow, and freezing temperatures, so protect every electrical connection. Use waterproof connectors or cover plugs with weatherproof boxes designed for outdoor use.
Apply silicone sealant around exposed wire joints to keep moisture out. Double-check that cords and plugs are rated for outdoor use—this isn’t the place to cut corners. How would you feel if a small oversight caused your lights to short out on a snowy night?
Mounting On The Tree
Mounting your snowflake outdoor tree lighted decorations properly is key to a stunning and safe display. The way you attach them affects not only how they look but also how well they hold up against wind and weather. Paying attention to the mounting details ensures your decorations stay vibrant all season long.
Attaching Decorations Securely
Start by choosing strong, weather-resistant fasteners like zip ties or twist ties. These hold decorations firmly without damaging branches. Wrap ties around sturdy parts of the tree, such as thicker branches or the trunk, to prevent slipping.
Try to avoid tying directly onto delicate twigs that might break easily. Instead, use small hooks or clips designed for outdoor use. These allow you to adjust or remove decorations quickly without leaving marks.
Have you noticed decorations sagging or falling after a windy night? That’s often due to loose attachments. Check each fastener by gently tugging to confirm it’s tight enough to keep your snowflakes in place.
Hiding Wires Neatly
Visible wires can distract from your beautiful snowflake lights. Tuck wires along the tree’s natural lines, such as following branch angles or wrapping them around the trunk. This makes the lights appear to glow effortlessly.
Use green or brown wire covers that blend with the tree’s color. These covers disguise cords and protect them from moisture. You can also secure wires with small clips to keep them from dangling.
Think about where your power source is located. Running wires underground or along the tree base helps keep everything tidy and reduces tripping hazards. Have you tried using outdoor-rated extension cords with built-in wire management features? They can make your setup cleaner and safer.
Safety Tips
Safety is key when creating snowflake outdoor tree lighted decorations. You want your display to shine brightly without any risks. Paying attention to safety tips protects you, your home, and your decorations from potential hazards.
Outdoor Electrical Safety
Only use lights and extension cords rated for outdoor use. Indoor cords can short circuit or cause fires when exposed to moisture. Check every wire for frays or damage before plugging them in.
Use ground fault circuit interrupter (GFCI) outlets to prevent electrical shocks. If you don’t have one outdoors, a portable GFCI adapter works well. Never overload outlets; too many lights on a single circuit can trip breakers or spark fires.
Keep all connections off the ground. Use hooks or insulated clips to secure cords to branches or your tree trunk. This avoids water pooling around plugs, which is a common cause of electrical hazards.
Weather Considerations
Think about your local weather conditions before setting up. Snow, rain, and wind can damage decorations or cause electrical shorts. Choose weather-resistant lights and secure them firmly against strong gusts.
Consider how melting snow or ice might drip on your lights or cords. Elevate plugs and connectors to keep them dry. If severe weather is forecast, unplug your decorations to avoid damage or accidents.
Have you noticed how quickly a sunny day can turn into a winter storm? Planning for sudden weather changes keeps your decorations safe and extends their life. Do you have a spot where you can easily disconnect everything if needed?
Customization Ideas
Customization Ideas let you create unique snowflake tree decorations. This makes your outdoor display stand out. Small changes bring big visual impact. These ideas help you tailor decorations to your style and space. Experiment with colors and textures to catch the eye.
Color Variations
Change the color of your snowflake lights for different moods. Use warm white for a cozy feel. Cool white gives a crisp, wintery look. Mix colors like blue, red, or green for a festive vibe.
- Try pastel shades for a soft, elegant display.
- Use bright colors for a lively, fun atmosphere.
- Combine multiple colors for a rainbow effect.
Colored bulbs or LED covers easily change the color. Paint the snowflake frame with weatherproof spray paint. This adds lasting color that matches your theme.
Adding Sparkle And Texture
Sparkle and texture add depth to your decorations. Use glitter spray to give a shimmering finish. Attach faux snow or cotton for a fluffy, snowy look.
- Wrap thin tinsel around the frame for shine.
- Add small crystals or beads for sparkle.
- Use frosted spray to create icy textures.
Mix materials like metal, plastic, or fabric for different feels. Textures catch light and create shadows, enhancing the visual effect. These details make your snowflake decorations more interesting and festive.

Credit: www.ebay.com
Frequently Asked Questions
What Materials Are Needed For Snowflake Tree Decorations?
You need LED lights, wire frames, zip ties, and waterproof connectors. These materials ensure durability and bright illumination outdoors. Using energy-efficient LED lights also reduces power consumption and enhances safety.
How Do You Secure Lights On Outdoor Trees?
Use zip ties to fasten lights tightly to branches. Wrap lights evenly for balanced illumination. Secure connections with waterproof connectors to prevent weather damage and maintain electrical safety.
Can Snowflake Decorations Withstand Harsh Weather?
Yes, if made with waterproof lights and sturdy wire frames. Proper installation and weatherproof materials protect against rain, snow, and wind. Regular inspection ensures decorations stay intact throughout the season.
How Long Does It Take To Create Snowflake Tree Lights?
It typically takes 2-4 hours depending on tree size and design complexity. Preparation and testing add to setup time. Planning ahead saves time and ensures a professional look.
Conclusion
Creating snowflake outdoor tree lighted decorations brings joy and charm. These decorations brighten your yard with a festive glow. You can make them using simple materials and easy steps. They add a magical touch to any outdoor space. Everyone can enjoy crafting and displaying these lights.
Try making your own snowflake lights this season. Celebrate the holidays with a warm, sparkling atmosphere. Let your creativity shine through these beautiful decorations.