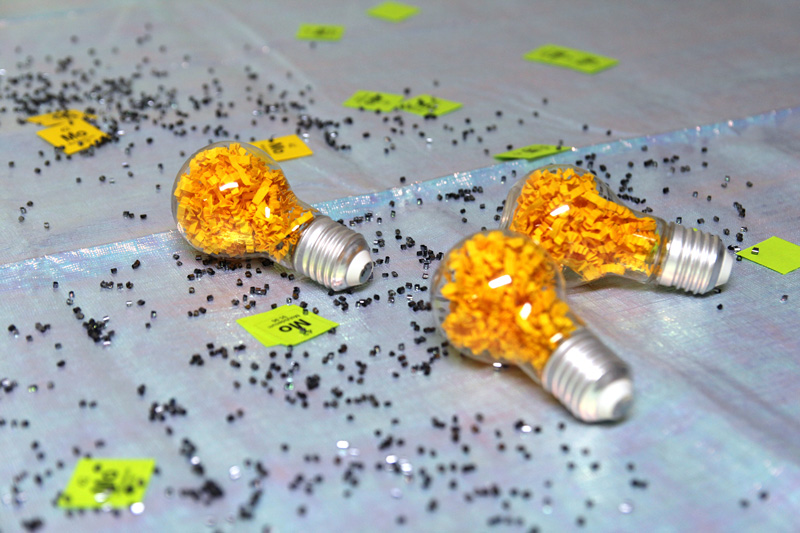
Are you looking to add a personal touch to your space without spending a fortune? Decorating plastic light bulbs is a simple and fun way to brighten up any room.
Whether you want to create cozy lighting for your living room or add a splash of color to your party, these easy decorating ideas will help you transform plain bulbs into stunning pieces. Keep reading to discover creative tips that anyone can try—and watch how your everyday bulbs turn into eye-catching decor!

Credit: www.walmart.com
Materials Needed
Gathering the right materials is key to transforming plain plastic light bulbs into eye-catching decorations. Knowing what types of bulbs you’re working with and having the proper tools ready can make your creative process smoother and more enjoyable. Before you start, take a moment to consider what look you want to achieve and how durable your decoration needs to be.
Types Of Plastic Bulbs
Plastic light bulbs come in several styles, and each type offers different decorating opportunities. Some are clear and smooth, perfect for painting or filling with small items like glitter or beads. Others have a frosted or textured surface, which can add an interesting base without much extra effort.
Consider whether your bulbs are hollow or solid. Hollow bulbs allow you to add fillings like fairy lights or colored sand, while solid ones are better suited for surface decoration such as stickers or paint. Choosing the right type helps you avoid frustration and ensures your decorations last longer.
Tools And Supplies
Having the right tools makes decorating easier and your results more professional. You’ll want a variety of paints—acrylics work well on plastic—and brushes of different sizes for detailed or broad strokes. Permanent markers and adhesive vinyl sheets also offer quick, clean designs.
Don’t forget about adhesives like clear glue or double-sided tape for attaching embellishments. Small craft items such as ribbons, sequins, and tiny pom-poms can add texture and color. A hot glue gun can be handy for securing heavier decorations, but use it carefully to avoid melting the plastic.
Think about what you already have at home. Sometimes, a quick look in your craft drawer reveals perfect materials you hadn’t considered. What unique tools or supplies can you bring into your decorating project to make your bulbs truly stand out?
Preparation Tips
Getting your plastic light bulbs ready for decoration sets the stage for a flawless finish. Without proper preparation, paint or adhesives might not stick well, leaving your work looking rushed or uneven. Taking time to clean and protect both yourself and your workspace can make all the difference.
Cleaning And Priming
Start by wiping your plastic bulbs with a soft cloth dipped in warm, soapy water. This removes dust, oils, and any residue that could prevent paint from adhering properly. Let the bulbs dry completely before moving to the next step.
Next, apply a primer designed for plastic surfaces. Primers create a rougher texture that helps paint stick better and last longer. Spray primers work best for even coverage, but you can also use a brush-on type if you prefer more control.
Have you noticed how skipping primer sometimes leads to patchy spots? Using primer avoids that frustration and gives your design a smooth canvas.
Safety Precautions
Working with paint, primers, and adhesives means you should protect yourself and your environment. Always work in a well-ventilated area to avoid inhaling fumes, which can be harmful even in small amounts.
- Wear gloves to keep chemicals off your skin and prevent smudging your design.
- Use protective eyewear if you’re spraying or sanding the bulbs.
- Cover your workspace with newspapers or a drop cloth to catch any spills or overspray.
Remember, taking simple safety steps lets you focus on creativity without worrying about accidents or messes. How much more enjoyable would your decorating be if you felt fully safe and prepared?
Painting Techniques
Plastic light bulbs can be decorated using spray paint or acrylics for a smooth finish. Light sanding helps paint stick better and prevents peeling. Simple designs or patterns brighten up dull bulbs quickly and easily.
Decorating plastic light bulbs can transform any space. Painting them is an excellent way to customize. It adds color and character. You can use different techniques to achieve various effects. Below are some methods to paint plastic light bulbs beautifully.Spray Painting
Spray painting offers a smooth, even finish. Choose a spray paint designed for plastic surfaces. Hold the bulb from the top. Spray from a distance of about 12 inches. Use quick, light bursts to cover evenly. Let each coat dry before applying another. This prevents drips and runs. Experiment with colors to create a gradient effect.Hand Painting With Brushes
Hand painting allows for intricate designs. Use acrylic paint for best results. Start with a clean, dry bulb. Dip a small brush in paint. Apply gently in thin layers. Create patterns or images as desired. Let each layer dry completely. This technique is perfect for detailed work. You can customize each bulb uniquely.Using Stencils
Stencils make it easy to add designs. Choose a stencil pattern you love. Secure it over the bulb with tape. Use a sponge or brush to apply paint. Dab lightly to avoid smudging. Once dry, carefully remove the stencil. Repeat the process for multiple designs. This method is ideal for repeating patterns. It adds a professional touch to your bulbs.Adding Texture And Dimension
Adding texture and dimension to plastic light bulbs transforms plain bulbs into eye-catching decor pieces. It brings life and interest by creating layers and tactile surfaces. These techniques make your bulbs stand out with unique looks and styles.
Using different materials and decorations gives your bulbs a rich, three-dimensional feel. This creates depth and invites touch, making your light bulbs not just functional but also artistic. Let’s explore ways to add texture and dimension to your plastic light bulbs.
Glitter And Sequins
Glitter and sequins add sparkle and shine to your bulbs. They catch light and create a lively effect. Use glue to cover the bulb surface, then sprinkle glitter or press sequins onto it.
- Apply glue evenly for smooth coverage.
- Sprinkle glitter while glue is wet.
- Press sequins gently for firm attachment.
- Let dry fully before handling.
Combine different colors and sizes for a vibrant look. This method is perfect for festive or playful decorations.
Fabric And Paper Wraps
Fabric and paper wraps create soft texture and color variation. Cut strips or shapes and wrap them around the bulb. Use glue or double-sided tape to secure the material.
- Choose lightweight fabric or thin paper.
- Wrap tightly to avoid wrinkles.
- Overlap edges for full coverage.
- Combine patterns for a creative design.
This method adds warmth and a handcrafted feel to your bulbs. It works well with floral, rustic, or vintage themes.
3d Embellishments
3D embellishments give your bulbs a bold, tactile look. Attach small objects like beads, buttons, or miniature flowers. Use strong glue to keep embellishments in place.
- Select embellishments that suit your style.
- Place them evenly or cluster for effect.
- Press firmly and let dry completely.
- Mix sizes and shapes for visual interest.
These decorations create a striking and textured surface. Perfect for unique gifts or statement pieces in your home.
Lighting Effects
Lighting effects can transform simple plastic light bulbs into stunning decor pieces. They create mood and atmosphere in any space. Different techniques bring unique looks and styles. Experimenting with light effects can make your bulbs truly shine.
Glow-in-the-dark Paint
Glow-in-the-dark paint adds a magical touch to plastic bulbs. It absorbs light during the day and glows softly at night. Apply the paint in thin layers for the best effect. Choose bright colors like green or blue for stronger glow. This effect works well in bedrooms or outdoor spaces.
Led Integration
LED lights inside plastic bulbs offer vibrant and colorful illumination. Small LED strips or fairy lights fit easily inside. LEDs use less energy and last long. Change colors with remote controls for dynamic displays. Secure LEDs carefully to avoid shifting inside the bulb.
Light Diffusion Tips
Light diffusion softens and spreads light evenly. Use frosted spray or thin white paper inside the bulb. This reduces harsh shadows and glare. Layer materials for a gentle glow effect. Diffusion helps create a cozy and inviting atmosphere with your decorated bulbs.
Theme Ideas
Choosing a theme helps bring life and personality to your decorated plastic light bulbs. Themes guide your color choices, materials, and designs. They make the bulbs fit perfectly in any room or occasion. Here are some easy and fun theme ideas to inspire your creativity.
Holiday Decorations
Holiday-themed bulbs create festive vibes quickly. Use red, green, and gold for Christmas. Add tiny ornaments or glitter for sparkle. For Halloween, paint bulbs in orange and black. Stick on small bats or ghosts for a spooky touch. Easter themes work well with pastel colors and small flower stickers.
Nature-inspired Designs
Nature themes bring calm and beauty indoors. Paint bulbs with soft greens and browns. Use leaves, flowers, or animal shapes to decorate. Wrap twine or raffia around the bulb for a rustic look. Small pinecones or acorns glued on add texture. These bulbs fit well in living rooms or garden spaces.
Abstract And Modern Styles
Abstract designs focus on bold colors and shapes. Use bright paint splashes or geometric patterns. Metallic paints like gold and silver add a modern shine. Try wrapping bulbs with colorful thread in random patterns. These styles suit contemporary spaces and creative studios.
Display And Use
Displaying and using decorated plastic light bulbs can transform any space. These bulbs bring charm and creativity to your home or events. Their lightweight nature makes them easy to place anywhere. Use them to brighten up rooms, tables, or outdoor areas. Here are some inspiring ways to showcase your decorated bulbs.
Hanging And Stringing Ideas
Hang decorated bulbs from ceilings or tree branches for a magical effect. Use clear fishing wire or colorful ribbons to suspend them. Create a string of bulbs to make a unique garland. Space them evenly for a balanced look. Combine different colors and patterns to add variety.
Table Centerpieces
Decorated bulbs make eye-catching table centerpieces. Arrange them in a shallow bowl or tray filled with stones or moss. Mix bulbs with candles or flowers for a soft, inviting look. Use small stands or holders to keep bulbs upright. This setup works well for dinners or parties.
Outdoor Decorations
Use decorated plastic bulbs to brighten gardens or patios. Place them in lanterns or hang them from tree branches. They are weather-resistant and safe for outdoor use. Scatter bulbs along walkways to guide guests at night. Combine bulbs with fairy lights for extra sparkle.

Credit: www.amazon.com
Troubleshooting Common Issues
Decorating plastic light bulbs can transform ordinary objects into eye-catching decor pieces. However, you might face some common issues that can be frustrating. Understanding how to troubleshoot these problems will save you time and help you achieve a flawless finish.
Paint Peeling
Paint peeling happens when the surface isn’t properly prepared. Plastic is smooth and non-porous, so the paint struggles to stick.
To avoid peeling, lightly sand the bulb with fine-grit sandpaper before painting. This creates a rough surface for the paint to grip. Using a plastic primer also makes a big difference; it acts as a bonding layer between the plastic and the paint.
Have you noticed how some paints chip off after a few days? That’s often because the paint wasn’t designed for plastic surfaces. Always check if your paint is labeled for plastic use.
Uneven Coating
An uneven coating can make your decorated bulb look sloppy. This usually happens when paint is applied too thickly or too quickly.
Spray paint or acrylic paint applied in multiple thin layers will give a smooth finish. Allow each layer to dry completely before adding the next. Patience here pays off more than rushing to cover the surface.
If you see drips or streaks, gently smooth them with fine sandpaper once dry, then add another thin coat. This step can turn a rough paint job into a professional-looking surface.
Bulb Durability
Plastic light bulbs are delicate, and their durability depends on how you handle them during and after decorating.
After painting, apply a clear sealant designed for plastic. This protects your artwork from scratches and fading. Some sealants also add a waterproof layer, which is useful if your bulbs hang in humid areas.
Consider how you will use or display your bulbs. Are they going to be handled often or kept as a permanent fixture? This affects the type of paint and sealant you should choose.

Credit: www.youtube.com
Frequently Asked Questions
How Can I Safely Decorate Plastic Light Bulbs?
Use non-toxic paints or markers designed for plastic surfaces. Avoid heat or flammable materials near bulbs. Always handle bulbs gently to prevent damage and ensure decorations do not block light.
What Materials Work Best For Decorating Plastic Bulbs?
Acrylic paints, permanent markers, washi tape, and adhesive gems stick well. These materials are safe, easy to apply, and won’t damage the plastic surface or affect the bulb’s function.
Can I Use Hot Glue On Plastic Light Bulbs?
Hot glue can damage thin plastic bulbs or cause them to melt. Use craft glue or double-sided tape for safer adhesion. Always test a small area first to avoid ruining the bulb.
How Do I Make Plastic Bulbs Look Festive?
Add glitter, paint patterns, or wrap bulbs with colorful yarn. Use ribbons or small ornaments to enhance the festive vibe. Keep decorations lightweight to avoid bulb breakage.
Conclusion
Decorating plastic light bulbs adds charm to any space. You can use paint, glitter, or fabric to create unique designs. These ideas are simple and budget-friendly. Try different styles to match your room’s theme. Each bulb can bring a personal touch.
Enjoy crafting and brightening your home with these tips. Creativity makes decorating fun and easy. Start today and see the difference it makes!