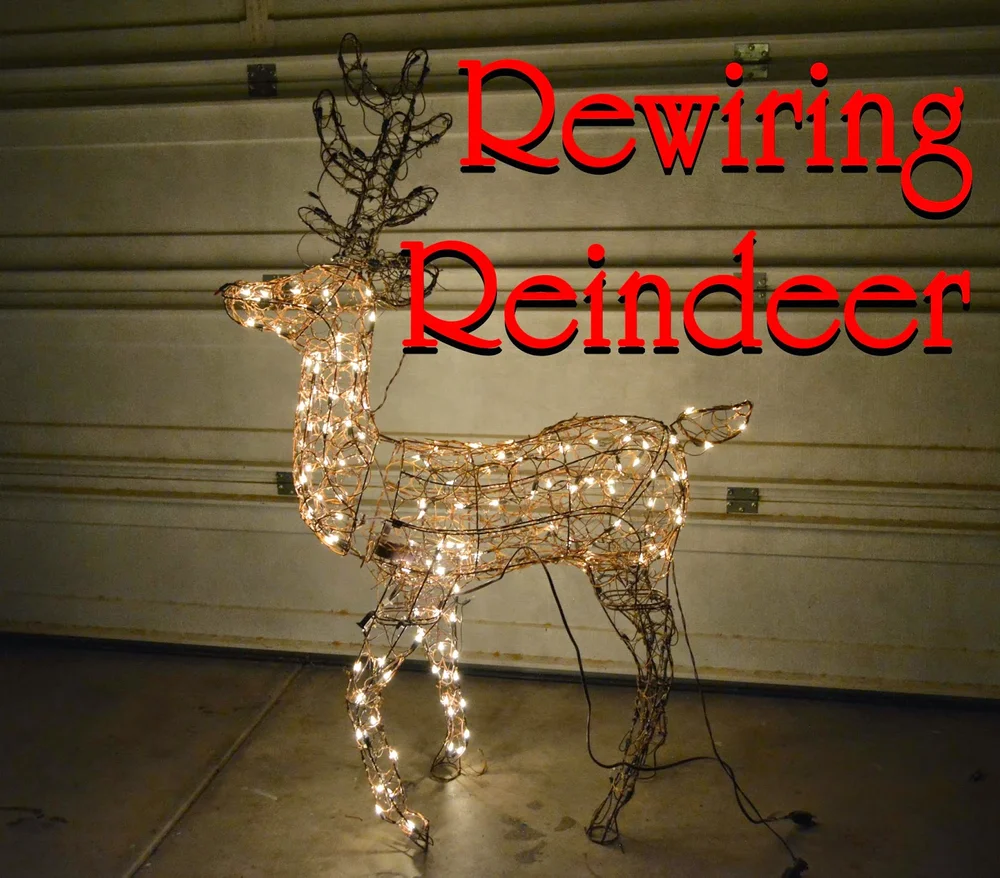
Are your Holiday Decoration Deer Christmas Lights flickering or not shining as bright as they should? You’re not alone.
When these charming lights don’t work right, it can take the sparkle out of your festive display. But don’t worry—you can fix them yourself, even if you’re not an expert. You’ll discover simple, step-by-step tips to bring your deer lights back to life quickly and safely.
Keep reading, and get ready to make your holiday decorations shine brighter than ever!

Credit: www.amazon.ca
Common Issues With Deer Christmas Lights
Deer Christmas lights add a magical touch to your holiday decorations, but they can sometimes stop working properly. Identifying the common issues helps you fix them faster and enjoy your festive display without frustration. Let’s look at some typical problems you might face and how to recognize them.
Broken Bulbs
One of the most frequent issues is broken or burnt-out bulbs. Even a single dead bulb can cause a whole section of lights to go dark. You should check each bulb carefully for cracks, blackened tips, or loose connections.
Replacing broken bulbs is usually straightforward. Keep a set of spare bulbs handy, as matching the size and voltage is crucial. Have you ever noticed how one tiny bulb can affect the entire string? That’s why quick bulb checks save time and hassle.
Power Supply Problems
Power supply issues can stop your deer lights from lighting up at all. Check if the plug is securely connected to the outlet, and test the outlet with another device to rule out power failure. Sometimes, the problem lies in the fuse inside the plug; replacing it can restore power.
If your lights flicker or don’t stay on consistently, the power source might be unstable. Using a surge protector can protect your decorations from voltage spikes. Have you tested your power supply before assuming the lights are faulty?
Damaged Wiring
Wiring damage is a silent enemy that can cause shorts or prevent electricity from flowing. Look for frayed wires, exposed copper, or melted insulation, especially if the lights have been stored improperly. Weather exposure, like rain or snow, can worsen wiring conditions over time.
Fixing wiring requires caution—always unplug the lights first. Small wire breaks can sometimes be repaired with electrical tape or wire connectors. If the damage is extensive, replacing the entire wiring might be safer than risking a fire hazard.
Credit: www.dollargeneral.com
Tools Needed For Repairs
Fixing holiday decoration deer Christmas lights requires the right tools. Having the proper equipment makes repairs easier and safer. It helps you spot problems and fix them quickly. Prepare a small toolkit before starting your repair work. Organize tools to avoid delays and frustration during the process.
Basic Repair Kit
- Wire cutters – for trimming damaged wires
- Electrical tape – to insulate and secure connections
- Replacement bulbs – in case some lights are burnt out
- Multimeter – to check electrical continuity and voltage
- Screwdriver set – to open compartments and tighten screws
- Wire strippers – to remove insulation without damaging wires
- Heat shrink tubing – for protecting repaired wire joints
Safety Gear
- Insulated gloves – protect from electric shock
- Safety glasses – shield eyes from sparks or debris
- Non-slip shoes – prevent falls while working on ladders
- Flashlight – for better visibility in dark areas
Step-by-step Repair Process
Holiday decoration deer Christmas lights add a magical glow to your festive season. When they unexpectedly go dark, it can dampen your holiday spirit. Luckily, you don’t need to be an electrician to revive them. The repair process is simpler than you might think, and with some basic tools, you can get your lights twinkling again in no time.
Identifying The Faulty Area
Start by examining the deer lights carefully. Often, the issue is as straightforward as a single faulty bulb. Look for any bulbs that appear burnt out or are visibly damaged. You might notice a flickering or completely dark section in the string of lights. This section is likely where the problem lies.
Replacing Broken Bulbs
Once you’ve pinpointed the problematic area, replacing broken bulbs is the next step. Ensure you have spare bulbs that match the ones used in your deer decoration. Carefully remove the damaged bulb and replace it with a new one. Make sure it’s securely seated in its socket to avoid loose connections.
Fixing Wiring Issues
If the bulbs are intact but the lights still don’t work, wiring issues might be to blame. Inspect the wiring for any visible cuts or frays. You might find wires that have been pinched or exposed. Use electrical tape to cover any exposed areas and prevent short circuits. Sometimes, gently adjusting the wiring can restore the connection.
Testing The Lights
After making repairs, testing the lights is crucial. Plug them in and observe if the previously dark sections illuminate. If everything looks good, you’ve successfully fixed your holiday deer lights. If issues persist, retrace your steps to ensure no faulty bulbs or wiring remain.
Have you ever faced a stubborn string of lights and felt defeated? It’s surprising how a little patience and attention to detail can bring back the sparkle. What’s your go-to strategy when fixing holiday lights?

Credit: www.cbc.ca
Preventive Maintenance Tips
Keeping your Holiday Decoration Deer Christmas Lights in top shape saves you time and frustration every season. Preventive maintenance helps avoid unexpected failures and keeps your display bright and safe. Simple habits can extend the life of your lights and ensure they work perfectly year after year.
Proper Storage
How you store your Christmas lights affects their durability. Avoid tossing them in a box loosely; instead, wrap the strands carefully to prevent tangling and wire damage.
Use a sturdy container or a dedicated storage reel to keep them organized. Adding silica gel packets can help reduce moisture, which causes corrosion and shorts.
Regular Inspections
Check your lights before and after each use. Look for frayed wires, broken bulbs, or loose connections that can cause malfunctions or fire hazards.
Test each strand by plugging it in briefly to spot flickering or dead bulbs early. Replacing bulbs or fixing small issues right away prevents bigger problems later.
Safe Usage Practices
How you use your lights impacts their lifespan. Avoid overloading extension cords or outlets, as this can cause overheating and damage.
Always unplug lights before handling or moving them to reduce wear and risk of electric shock. Using outdoor-rated lights and connectors ensures they withstand weather conditions better.
When To Replace Your Deer Lights
Knowing when to replace your holiday decoration deer lights can save you time and frustration. Sometimes a simple fix works, but other times, the damage is beyond repair. Recognizing the right moment to let go helps keep your display safe and stunning year after year.
Signs Of Irreparable Damage
Check your deer lights carefully for any broken wires or exposed wiring. If you see frayed cords or sparks when plugged in, it’s a clear danger sign. Burnt-out bulbs that won’t light up after swapping are another red flag.
Also, inspect the frame of the deer. Bent or cracked parts that affect stability aren’t easy to fix. If your deer lights have water damage or corrosion inside the bulbs or connectors, replacing them is often safer and more cost-effective.
Have you noticed flickering lights or sections that don’t glow at all, even after replacing bulbs? These are signs that the internal wiring might be faulty. Continuing to use such lights risks electrical shorts or even fire hazards.
Choosing New Decorations
When selecting replacement deer lights, think about durability and energy efficiency. LED lights last longer and use less power compared to traditional bulbs. Plus, they stay cooler, reducing fire risk.
Consider the size and style of your new deer lights to match your existing holiday theme. Some models come with weatherproof features, which can withstand snow and rain better. This saves you from frequent replacements and extra hassle.
Look for products with good reviews on safety and reliability. Sometimes spending a bit more upfront prevents headaches later. Have you considered adding smart lights that you can control remotely? They offer convenience and fun customization options.
Frequently Asked Questions
How Do I Fix Holiday Deer Lights Not Turning On?
First, check the power source and plug connection. Inspect bulbs for damage or looseness. Replace faulty bulbs or fuses to restore functionality.
Why Are Some Deer Christmas Lights Flickering?
Flickering usually indicates a loose bulb or damaged wiring. Ensure all bulbs are secure and wires are intact. Replace any defective components promptly.
Can I Repair Broken Wires On Deer Lights Safely?
Yes, use electrical tape or wire connectors to repair minor breaks. Always unplug lights before fixing wires to avoid electric shock.
What Causes Holiday Deer Lights To Short Circuit?
Short circuits often result from frayed wires or moisture exposure. Inspect wires for damage and keep decorations dry to prevent shorts.
Conclusion
Fixing holiday decoration deer Christmas lights can be simple and quick. Check each bulb and wire carefully for breaks or loose connections. Replace any broken bulbs to restore the glow. Keep your decorations dry and safe from weather damage. Test the lights before hanging the deer again.
Enjoy the warm, festive look of your bright holiday display. Small fixes save money and keep your decorations shining bright. Celebrate the season with lights that work perfectly every time.