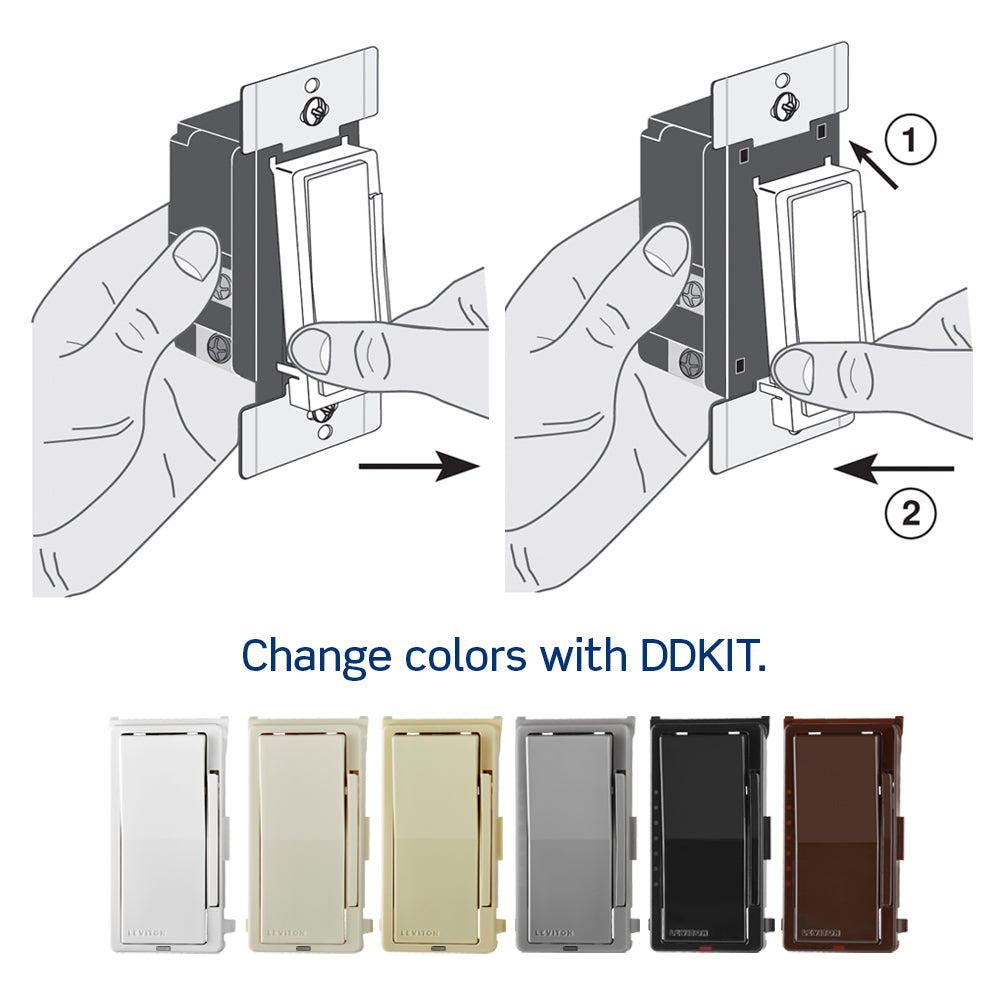
Are you ready to upgrade your home lighting with the Leviton Decora Smart WiFi Light Switch? Installing this smart switch can seem tricky at first, but with the right guidance, you’ll have it up and running quickly.
Imagine controlling your lights from anywhere using your phone or voice—giving you convenience and energy savings at your fingertips. In this guide, you’ll find simple, step-by-step instructions to make the installation smooth and stress-free. Keep reading to take control of your home lighting like a pro!
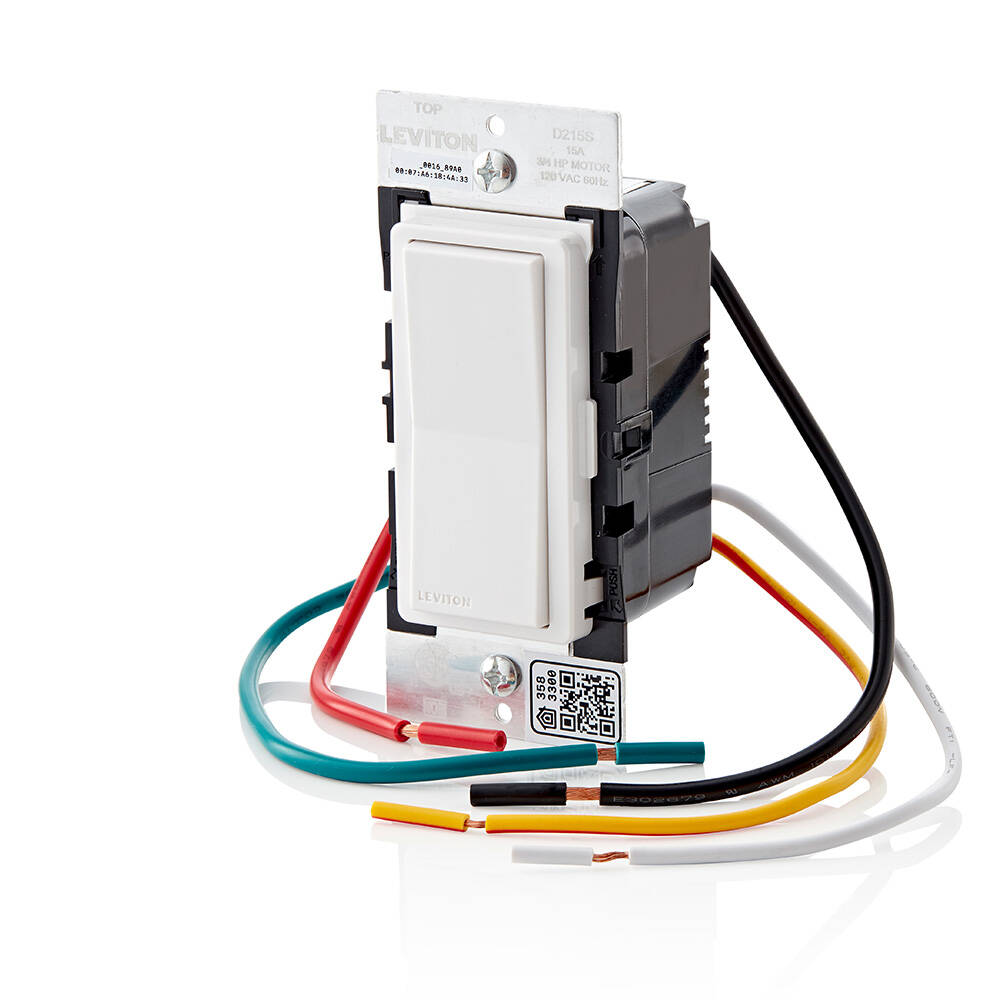
Tools And Materials Needed
Installing a Leviton Decora Smart WiFi Light Switch requires some basic tools and materials. Having everything ready makes the process smoother and safer. This guide lists the essential items to prepare before starting the installation.
Essential Tools For Installation
- Voltage Tester – Checks if the power is off
- Flathead Screwdriver – Removes switch plate and screws
- Phillips Screwdriver – Tightens screws on the switch
- Wire Strippers – Strips insulation from wires
- Needle-Nose Pliers – Helps bend and hold wires
- Electrical Tape – Insulates wire connections
- Ladder or Step Stool – Reaches high switch locations
Materials Needed For The Switch
- Leviton Decora Smart WiFi Light Switch
- Wire Nuts – Secures wire connections
- Replacement Wall Plate (if needed)
- Smartphone or Tablet – For setup via app
Safety Equipment To Have
- Insulated Gloves – Protects against electric shock
- Safety Glasses – Shields eyes from debris
- Flashlight – Provides light in dark areas
Credit: www.aartech.ca
Safety Tips Before Starting
Ensure power is off at the circuit breaker to prevent electrical shock. Verify switch compatibility with your home setup. Gather necessary tools, including a screwdriver and voltage tester, for a seamless installation process.
Before you embark on the journey of installing your Leviton Decor Smart Wifi Light Switch, it’s crucial to prioritize safety. Think of this as preparing your canvas before painting; ensuring everything is set for a smooth process. Many DIY enthusiasts overlook safety measures in their excitement to get started, but taking a few precautionary steps can prevent mishaps and ensure a successful installation. Let’s dive into some essential safety tips that will give you peace of mind.Turn Off The Power
The first and most critical safety step is to turn off the power supply to the switch you’re planning to replace. Locate the circuit breaker in your home and switch off the corresponding breaker. Double-check by trying to turn on the light; if it doesn’t light up, you’re good to proceed.Use Insulated Tools
Investing in a set of insulated tools is a smart move. These tools protect you from electric shocks by providing an extra layer of safety. Even if you’re careful, accidents can happen, and insulated tools are a simple way to protect yourself.Check For Loose Wires
Before installing the new switch, inspect the wires in the junction box. Ensure none are frayed or loose. Loose wires can lead to malfunctioning switches or even electrical fires, so handle them with care and secure them properly.Wear Safety Gear
Safety goggles and gloves might seem excessive, but they are essential. Goggles protect your eyes from dust and debris, while gloves provide a secure grip and protection against electrical shocks. It’s better to be over-prepared than face unexpected injuries.Understand Your Home’s Wiring
Every home has a unique wiring setup. Familiarize yourself with the wiring system in your home before starting. This understanding can prevent incorrect connections and ensure seamless installation of your smart switch. Remember, safety is not just a step; it’s a mindset you carry throughout the installation process. By taking these precautions, you can confidently install your Leviton Decor Smart Wifi Light Switch, knowing you’ve done everything to ensure your safety. Are there any other safety tips you’ve found helpful in your DIY projects?Turn Off Power Supply
Before you start installing your Leviton Decora Smart WiFi Light Switch, turning off the power supply is an essential safety step. It protects you from electric shocks and prevents damage to the switch or your home’s wiring. Skipping this step can lead to serious injury or costly repairs.
Locate Your Circuit Breaker Panel
Find the main electrical panel in your home. It’s usually in a basement, garage, or utility room. Look for the breaker that controls the light switch you plan to replace.
Not sure which breaker controls your switch? Flip breakers one at a time and test the switch until the power is off. This hands-on approach saves guesswork and ensures safety.
Switch Off The Correct Breaker
Once you identify the right breaker, flip it to the “off” position. This cuts power to the switch’s wiring. Double-check by trying the light switch to confirm it no longer works.
Be cautious not to turn off breakers that control essential appliances unless necessary. If uncertain, label your breakers for easier identification in the future.
Use A Voltage Tester To Confirm Power Is Off
Don’t rely solely on the breaker switch. Use a non-contact voltage tester to verify no current flows to the wires. Place the tester near each wire connected to the switch.
If the tester lights up or beeps, the power is still on. Only proceed when the tester confirms zero voltage. This step is your final check to prevent accidents.
Credit: www.familyhandyman.com
Remove Existing Switch
Before installing your Leviton Decora Smart WiFi Light Switch, removing the existing switch safely is crucial. This step sets the foundation for a smooth installation and ensures you don’t damage your home’s wiring. Let’s break down how to do this carefully and confidently.
Turn Off Power At The Circuit Breaker
Never start without cutting off the power. Locate your home’s circuit breaker panel and switch off the breaker connected to the light switch you want to replace. Double-check by toggling the wall switch—if the light doesn’t turn on, you’re safe to proceed.
Remove The Switch Cover Plate
Use a flathead screwdriver to unscrew the cover plate gently. Keep the screws somewhere safe because you will need them later. Removing this plate exposes the switch and wiring, making the next steps easier.
Unscrew The Existing Switch
With a Phillips screwdriver, remove the screws holding the switch to the electrical box. Slowly pull the switch out without yanking the wires. This allows you to see the connections clearly and prevents any accidental wire damage.
Before disconnecting anything, take a moment to identify each wire. You’ll commonly see a black (hot) wire, white (neutral) wire, and green or bare copper (ground) wire. Labeling them with tape can save you confusion when connecting your new smart switch.
Disconnect The Wires From The Old Switch
Loosen the terminal screws and carefully detach the wires. If your switch uses push-in connectors, gently press the release tab or use a small screwdriver to free the wires. Keep the wires straight and untangled for an easier new installation.
Identify And Label Wires
Before you start installing your Leviton Decora Smart WiFi Light Switch, identifying and labeling the wires is a crucial step. This process ensures safety and makes the installation smoother. Knowing which wire does what saves you from guesswork and potential hazards.
Locate The Wires In Your Wall Box
Begin by turning off power at your circuit breaker to avoid shocks. Remove your existing switch cover and gently pull out the switch to expose the wires. You should see several wires: usually black (hot), white (neutral), green or bare copper (ground), and sometimes a red wire (traveler or load).
Use A Voltage Tester For Safety
Double-check that power is off using a non-contact voltage tester. This tool helps confirm wires are safe to handle. Never skip this step—even if you think the breaker is off.
Identify Each Wire’s Function
Look at the wire colors and their positions on the old switch. The black wire is typically the hot wire delivering power. The white wire is neutral, completing the circuit. The green or bare copper wire is ground, protecting from electrical faults. If there’s a red wire, it usually connects to a second switch or a load.
Label Wires With Tape Or Stickers
Use masking tape or colored stickers to mark each wire. Write clear labels like “Hot,” “Neutral,” “Ground,” and “Load.” This simple step prevents confusion later and speeds up the connection process.
Document Wire Positions With A Photo
Take a clear photo of your wiring setup before disconnecting anything. This visual reference can save you if you forget which wire goes where. It’s a quick way to avoid costly mistakes.
Connect Leviton Smart Switch Wires
Connecting the wires of your Leviton Decor Smart WiFi Light Switch is a crucial step. Proper wire connections ensure your switch works safely and reliably. Always turn off power at the circuit breaker before handling wires. Use a voltage tester to double-check no current flows.
Each wire has a specific role. Ground wires protect against electrical faults. Neutral wires complete the electrical circuit. Line and load wires carry power to and from the switch. Follow the wiring instructions carefully to avoid damage.
Connect Ground Wire
Locate the green or bare copper wire in your wall box. This is the ground wire. Attach it to the green grounding screw on the Leviton switch. Use a screwdriver to tighten the screw firmly. If your wall box has a ground wire bundle, connect the switch ground wire to it using a wire connector.
Connect Neutral Wire
Find the white neutral wires in your wall box. These wires return electricity to the panel. Join the switch’s white neutral wire to this bundle. Use a wire connector to secure the connection. Make sure all wires are tightly twisted before capping. This connection is essential for smart functions.
Connect Line And Load Wires
Identify the black wires labeled as line and load. The line wire brings power from the breaker. The load wire leads to the light fixture. Connect the switch’s black line wire to the line wire in the box. Then, connect the red or black load wire from the switch to the load wire in your wall. Secure each connection with wire nuts. Check that no copper is exposed outside the connectors.
Secure The Switch And Wall Plate
Securing the Leviton Decora Smart WiFi Light Switch and its wall plate is a crucial step to ensure safety and a clean finish. A loose switch or wall plate can cause malfunction or even pose an electrical hazard. Taking your time here will pay off with a reliable and professional-looking installation.
Align The Switch Properly In The Electrical Box
Before tightening any screws, make sure the switch sits flush against the electrical box. If the switch is tilted or pushed too far back, it might cause wiring stress or damage. Check that the switch’s toggle or rocker is centered and easy to operate once mounted.
Use The Correct Screws To Secure The Switch
Leviton typically provides screws that fit perfectly with their Decora switches. Using these screws ensures a snug fit without damaging the switch body. Avoid overtightening, as this can crack the switch housing or strip the screw holes.
Attach The Wall Plate With Care
Once the switch is secured, place the wall plate over it and align the screw holes. Use the screws provided with the wall plate to fasten it gently. Over-tightening can warp the plate or cause it to crack, so tighten just enough to hold it firmly in place.
Check For Any Gaps Or Misalignment
After securing the wall plate, step back and check if it sits evenly against the wall. Small gaps can be a sign the switch or wiring is not properly seated. If you notice any unevenness, loosen the screws and adjust the switch before tightening again.
Test The Switch Function Before Finalizing
Before finishing up, turn the power back on and test the switch. Make sure it operates the light smoothly and connects to your WiFi as expected. Catching any issues now saves you from reopening the wall plate later.
Restore Power And Test Switch
After installing your Leviton Decora Smart WiFi Light Switch, restoring power and testing the switch is the crucial step to ensure everything works perfectly. This phase confirms that the wiring is correct and the device is ready to control your lights as expected. Let’s walk through the process to get your smart switch up and running smoothly.
Restore Power Safely
Head back to your circuit breaker panel and turn the power back on to the switch you just installed. It’s important to do this carefully to avoid any electrical mishaps.
If you had switched off multiple breakers, ensure you only restore power to the one linked to your switch first. This minimizes any risk of accidental short circuits.
Check The Switch Indicator Lights
Once power is restored, look at the LED indicator on the Leviton switch. It should light up, signaling that the switch has power.
If the light doesn’t come on, double-check your wiring connections. Sometimes a loose wire can cause the switch to stay off.
Test The Manual Function
Press the switch manually to turn the connected light on and off. This step verifies the basic mechanical function of the switch is working.
Does the light respond immediately? If not, re-inspect the connections or the bulb itself.
Confirm Wifi Connectivity
Open the Leviton app on your phone and check if the switch appears as connected. A successful connection means you can control the light remotely.
If the switch doesn’t show up, try restarting your router or moving closer to improve signal strength.
Run A Full Function Test
- Turn the light on and off using the app.
- Try voice commands if you’ve linked the switch to a smart assistant.
- Set up a schedule or scene to ensure automation works.
Testing these features confirms that your Leviton switch is fully integrated into your smart home system.
Have you ever thought about how much easier daily routines become with smart switches? Making sure yours works flawlessly from the start saves you time and frustration later.
Set Up Leviton App And Wifi
Setting up the Leviton Decor Smart WiFi Light Switch begins with connecting it to your home network and controlling it through the Leviton app. This process lets you manage your lighting conveniently from anywhere using your phone. Getting the app ready and linking your switch to WiFi ensures you unlock all smart features quickly and smoothly.
Download The App
Start by finding the Leviton app on your phone’s app store—it’s available for both iOS and Android. The app is free and only takes a moment to install. Once downloaded, open the app and create an account or sign in if you already have one.
Keep your login details handy because you’ll need them to access all the smart controls later. Have you checked if your phone’s operating system is up to date? Sometimes older versions can cause connectivity issues with smart home apps.
Connect Switch To Wifi
After installing the app, power on your Leviton switch and ensure it’s in pairing mode—usually indicated by a blinking light. Within the app, follow the prompts to add a new device. It will scan for the switch and ask you to connect it to your home WiFi network.
Make sure your phone is connected to the same WiFi network you want your switch on. The switch only supports 2.4 GHz networks, so check your router settings if you have a dual-band system. If the connection fails, try restarting your router or moving closer to it.
Customize Settings
Once connected, you can tailor the switch settings to fit your lifestyle. The app lets you rename the switch, set schedules, and adjust dimming levels if your model supports it. You might want to group switches by rooms for easier control.
Consider setting up voice assistant integration if you use Alexa, Google Assistant, or Siri. Have you explored the app’s automation features? They can turn your lights on or off based on your routines or even your location.
Troubleshooting Tips
Troubleshooting your Leviton Decora Smart WiFi Light Switch can save you time and frustration. Often, issues arise from simple oversights or minor technical glitches that you can fix yourself. Let’s explore some practical tips to get your switch working smoothly without needing professional help.
Check Your Wifi Connection
A stable WiFi connection is crucial for your smart switch to operate correctly. If your switch isn’t responding, start by verifying your router’s signal strength near the switch’s location. Walls and distance can weaken the signal, causing delays or disconnects.
Try moving your router closer or using a WiFi extender if the signal is weak. Have you noticed your phone losing connection in the same spot? That’s a good hint your switch might be facing similar issues.
Verify Proper Wiring
Incorrect wiring is a common cause of installation problems. Double-check that you connected all wires according to the Leviton installation guide—especially the ground and neutral wires. These are often overlooked but essential for proper function.
If your switch isn’t powering on or the lights flicker, turn off the circuit breaker and inspect the wiring again. Are the wire connectors tight and secure? Loose connections can cause intermittent power issues.
Reset The Switch To Factory Settings
If your switch behaves unpredictably, a factory reset can clear any glitches. To reset, press and hold the switch paddle for about 10 seconds until the LED blinks rapidly. This will erase your previous settings and let you start fresh.
After resetting, reconnect your switch to your WiFi network using the app. Have you tried this trick before? It often resolves issues that seem complicated at first.
Update Firmware Through The App
Leviton occasionally releases firmware updates to improve performance and fix bugs. Check the Decora Smart app regularly to ensure your switch runs the latest version. Ignoring updates can cause compatibility issues over time.
Updating is usually quick and simple, but make sure your phone stays near the switch during the process. What’s the last time you checked for an update on your smart devices?
Confirm App And Device Compatibility
Using the correct app version and compatible smartphone is critical. The Decora Smart app works best on recent iOS and Android versions. Older phones or outdated apps might have connectivity problems.
Try logging out and back into the app or reinstalling it if your switch isn’t showing up. Could your phone be the weak link in your smart home setup?
Credit: www.aartech.ca
Frequently Asked Questions
What Tools Are Needed To Install Leviton Decor Smart Wifi Switch?
You need a screwdriver, voltage tester, wire stripper, and electrical tape. A ladder may be required for high switches. Ensure power is off before starting installation for safety.
How To Connect Leviton Switch To Home Wifi?
Use the Leviton app to connect the switch to your WiFi. Follow in-app steps to enter your network details. Ensure your network is 2. 4GHz as 5GHz is not supported.
Can I Install Leviton Smart Switch Without A Neutral Wire?
No, Leviton Decor Smart WiFi switches require a neutral wire. This wire completes the electrical circuit for the switch to function. Check your switch box for a neutral wire before purchasing.
How To Reset Leviton Decor Smart Wifi Switch?
Press and hold the switch paddle for about 10 seconds until the light blinks. This restores factory settings. You can then reconnect the switch to your WiFi network.
Conclusion
Installing the Leviton Decor Smart WiFi Light Switch is simple and quick. Follow each step carefully for best results. Always turn off power before starting to stay safe. Test the switch after installation to ensure it works properly. Enjoy controlling your lights with ease from your phone.
Smart home living just got easier and more convenient. Keep this guide handy for future reference or troubleshooting. Your home lighting is now smarter and more efficient.