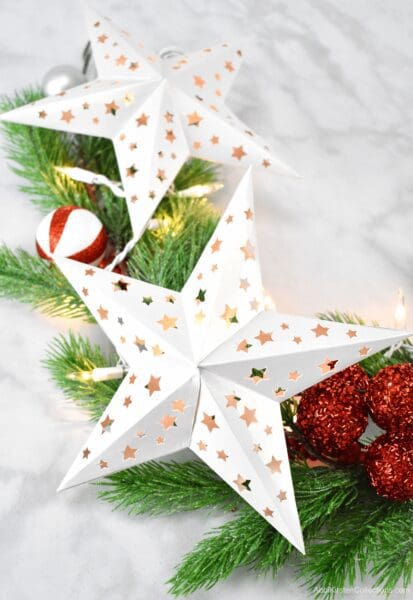
Do you want to add a magical touch to your space with a simple, glowing decoration? Making a lighted star decoration is easier than you think, and you don’t need fancy tools or skills.
Imagine your room filled with a warm, cozy glow that catches everyone’s eye. In this guide, you’ll discover step-by-step how to create your own stunning lighted star that brightens any corner. Ready to bring a sparkle to your home? Let’s get started!

Credit: in.pinterest.com
Materials Needed
Gathering the right materials is the first step to creating a stunning lighted star decoration. Knowing exactly what you need saves time and prevents frustration during the crafting process. Let’s look at the essential supplies that will bring your star to life.
Choosing The Right Star Frame
The frame forms the backbone of your star decoration. You can find star frames made from metal, wood, or even sturdy cardboard. Metal frames are durable and hold lights well, but wooden frames offer a rustic charm that many find appealing.
Think about where you’ll display your star. Will it be indoors or outside? This affects your choice—outdoor frames need to resist weather elements. Also, size matters. Larger frames require more lights and a sturdier base to stay balanced.
Selecting Lights
Your star’s glow depends entirely on the lights you choose. LED string lights are a popular pick because they use less energy and stay cool to the touch. You can select from warm white, cool white, or even multicolor LEDs based on the mood you want.
Consider the length of your lights and how densely you want them wrapped around the frame. Battery-operated lights offer flexibility if power outlets are scarce, but plug-in lights usually shine brighter. How bright do you want your star to be?
Additional Supplies
Besides the frame and lights, you’ll need a few more items to complete your project. Wire cutters and pliers help you shape and secure the frame and lights precisely. Zip ties or floral wire are great for attaching lights without damaging them.
Don’t forget extension cords if your decoration is large or far from a power source. A hot glue gun can add extra security for light placement, especially on wooden frames. Safety first: always check that your electrical components are rated for outdoor use if needed.
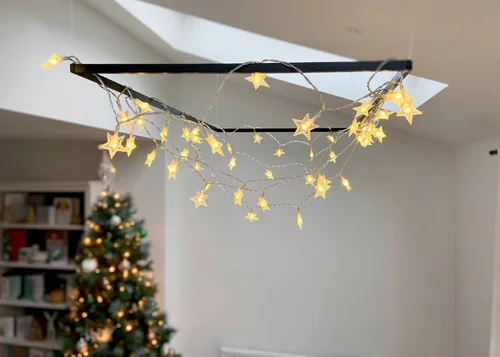
Credit: www.isoscella.co.uk
Preparing The Star Frame
Gather sturdy sticks or thin wooden dowels to form the star’s shape. Arrange them carefully, securing each joint tightly for a stable frame. Ensure the star is even and balanced before adding lights.
Preparing the Star Frame Creating a lighted star decoration begins with preparing the star frame. This step is crucial for ensuring the star is sturdy and ready for lights. Proper preparation enhances the decoration’s appearance and durability. Let’s explore the key actions involved.Cleaning And Inspecting The Frame
Start by thoroughly cleaning the star frame. Remove dust and dirt using a soft cloth. This ensures a smooth surface for attaching lights. Next, inspect the frame for any damage. Look for cracks or bends that might affect stability. Address any issues before proceeding. Secure loose joints with glue or screws as needed. This maintains the integrity of the frame.Securing The Frame For Lighting
Position the frame in a stable area for lighting. Ensure it won’t tip or move during installation. Use clamps or holders if necessary. Check the alignment to ensure it’s even. This prevents uneven lighting when the lights are attached. Test the frame’s stability by gently shaking it. It should remain firm without wobbling. Adjust supports if needed for better stability.Installing The Lights
Installing the lights on your star decoration is where your project truly comes to life. This step requires patience and a bit of creativity to ensure the lights highlight every angle and edge of your star. Paying close attention here will save you time later and prevent any frustrating rewiring or repositioning.
Wrapping The Lights Around The Frame
Start by laying your star flat on a table to get a clear view of the frame. Gently wrap the string of lights around the edges, following the shape of the star precisely. Keep the lights evenly spaced to avoid any dark spots once the star is hung up.
Don’t rush this part. Taking your time to wrap the lights tightly but gently prevents them from slipping off or tangling. If your frame has sharp corners or angles, pause and adjust the lights so they sit snugly without bending the wires.
Securing Lights With Tape Or Clips
Once your lights are wrapped, you need to secure them in place. Use clear tape or small clips designed for light strings to fasten the lights along the frame. This holds the lights steady and avoids shifting when you move or hang the star.
Choose tape that won’t leave residue or damage your frame material. If you’re using clips, make sure they’re the right size so they don’t pinch or damage the wiring. Securing your lights properly means you won’t have to redo this step after a single bump or gust of wind.
Testing The Light Setup
Before finishing up, plug in your lighted star to check how the lights look in action. Watch for any bulbs that don’t light up or areas that seem too dim. This gives you a chance to fix issues before you hang your decoration.
Try turning off other lights in the room to see how your star glows in low light. If you notice any loose connections or flickering bulbs, adjust or replace those lights immediately. What’s the point of a lighted star if it doesn’t shine bright and steady?

Credit: www.instagram.com
Adding Decorative Elements
Adding decorative elements brings your lighted star decoration to life. It enhances the charm and makes it unique. Small touches create a big impact. Choose decorations that match your style and the space where you’ll display the star. Think about colors, textures, and shapes to make your star stand out beautifully.
Using Ribbons And Garland
Ribbons add softness and color to your star. Pick ribbons that complement your light colors. Satin, velvet, or sheer ribbons work well. Wrap the ribbons around the star frame or tie bows at the points.
- Use wired ribbons for easy shaping.
- Layer different ribbon widths for depth.
- Choose holiday-themed patterns for festive looks.
Garlands add sparkle and texture. Tinsel or beaded garlands can wrap around the star. They reflect light and add shine. Secure garlands with small clear clips or thin wire to keep everything neat.
Incorporating Ornaments Or Beads
Ornaments and beads bring extra sparkle and detail. Tiny ornaments hang well on star points. Use lightweight beads to avoid weighing the star down.
- Glue beads along the edges for a delicate look.
- Cluster small ornaments in the star’s center for focus.
- Mix metallic and matte finishes for contrast.
Choose colors that match or contrast with your lights. Secure all pieces firmly to prevent falling. These small decorative touches transform your star into a stunning centerpiece.
Power Options And Safety
Choosing the right power source for your lighted star decoration affects both its appearance and safety. Understanding the differences between battery-powered and plug-in lights helps you decide which fits your setup best. Prioritizing safety ensures your beautiful creation won’t cause any electrical issues or hazards.
Battery Vs. Plug-in Lights
Battery-powered lights give you freedom. You can place your star anywhere, without worrying about finding a nearby outlet. This makes them perfect for outdoor decorations or spots where cords might look messy.
Plug-in lights, on the other hand, provide a constant power supply. You won’t have to worry about batteries dying in the middle of a party or event. However, they require easy access to an electrical outlet and careful cord management to avoid tripping hazards.
- Battery lights:Portable, cordless, but require regular battery replacement.
- Plug-in lights:Continuous power, no battery worries, but less flexible placement.
Ensuring Electrical Safety
Safety should never be an afterthought when working with lights. Make sure your lights are rated for the environment where you’ll use them—indoor or outdoor.
Check all wires and plugs for damage before use. Frayed cords or exposed wires increase the risk of electric shock or fire. Using lights with built-in fuses or circuit breakers adds an extra layer of protection.
- Keep connections dry and away from water sources.
- Secure cords to prevent trips and falls.
- Turn off lights when unattended or during sleep.
Have you ever experienced a light that suddenly stopped working because of a safety issue? Taking a few extra minutes to check your setup can save you from unexpected problems and keep your star shining bright and safe.
Displaying Your Star
Displaying your lighted star is where your creativity truly shines. The way you present it can transform any space, making the star the focal point of your decor. Think about the atmosphere you want to create and how your star’s light will interact with the surroundings.
Hanging Methods
Hanging your star gives it a floating, magical effect. You can use clear fishing wire for an almost invisible hold, making the star look like it’s glowing on its own.
Hooks or adhesive wall hangers work well if you want a simple setup. Just make sure they can support the star’s weight securely.
For outdoor displays, consider sturdy chains or weather-resistant cords. These options keep your star safe during wind or rain while maintaining its charm.
Placing On Surfaces
If hanging isn’t an option, placing your star on a surface can be just as striking. Try a mantelpiece or a shelf where the light can reflect off nearby objects.
Using a decorative tray or mirror underneath adds depth and makes the star’s glow even brighter.
Have you ever noticed how a star looks different depending on its background? Dark surfaces make the light pop, while lighter ones create a softer glow. Experiment with placement to find the effect you love most.
Troubleshooting Tips
Troubleshooting lighted star decorations can save time and keep your display bright. Small issues often cause major disruptions. Simple fixes restore the sparkle quickly. Below are helpful tips for common problems.
Fixing Flickering Lights
Flickering lights usually mean loose connections or faulty wiring. Check all plugs and sockets carefully. Make sure each bulb fits snugly in its socket. Gently wiggle bulbs to find loose contacts. Clean sockets with a dry cloth to remove dust.
Another cause might be voltage fluctuations. Try plugging the decoration into a different outlet. Avoid using too many extensions together. Use a stable power source for steady light.
Replacing Damaged Bulbs
Damaged or burnt-out bulbs dim your star’s glow. Identify broken bulbs by their dark or cloudy appearance. Unplug the decoration before replacing any bulbs. Handle new bulbs with clean hands or gloves to avoid oil residue.
Use bulbs matching the original size and voltage. Insert new bulbs firmly but without force. Test the lights after replacement to ensure all bulbs work well. Keep spare bulbs handy for quick swaps.
Frequently Asked Questions
What Materials Are Needed For A Lighted Star Decoration?
You need wire or wooden sticks, string lights, glue, and paint. Optional items include glitter and hooks for hanging. These materials are easy to find and affordable, making the project simple and fun.
How Do You Assemble A Lighted Star Decoration?
Start by shaping the frame into a star using wire or sticks. Secure joints with glue or tape. Wrap string lights evenly around the frame. Test the lights before decorating or hanging your star.
Can I Use Battery-powered Lights For This Decoration?
Yes, battery-powered lights are ideal for flexibility and easy placement. They eliminate the need for nearby outlets and reduce visible cords, making your star decoration neat and portable.
How To Safely Hang A Lighted Star Decoration?
Use sturdy hooks or nails to support the star’s weight. Ensure electrical connections are dry and secure. Avoid hanging near flammable materials to prevent fire hazards.
Conclusion
Creating a lighted star decoration adds charm to any space. The steps are simple and fun to follow. You can use easy materials found at home or a store. This project brings a warm, cozy feeling to your room. Try different sizes and colors for a unique look.
Enjoy the soft glow and festive vibe it creates. Making your own decoration also saves money. It’s a great way to spend time with family or friends. Brighten your home with this lovely, handmade star today.