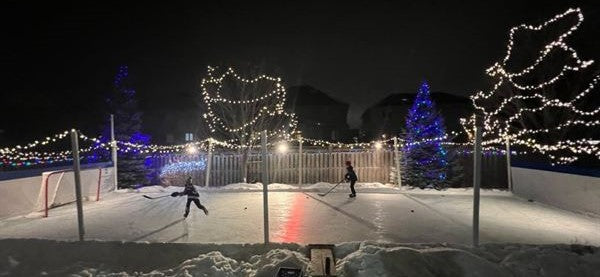
Imagine turning your outdoor space into a magical winter wonderland that glows with festive charm. You don’t need expensive decorations or complicated setups to create an eye-catching ice rink decorated with Christmas lights.
In this guide, you’ll discover simple, creative steps to make your own sparkling ice rink that will wow your family and friends. Ready to transform your holiday decoration game and bring joyful light to your celebrations? Keep reading—you’re about to learn how to make your space shine like never before.
Choosing The Right Location
Creating an ice rink adorned with Christmas lights is a magical way to celebrate the holiday season. However, the enchanting experience begins with choosing the right location for your rink. The ideal spot should not only ensure the ice stays solid but also provide a safe and festive environment for skating under the twinkling lights.
Assessing Space And Surface
Start by evaluating the available space in your yard or community area. Consider the size of the rink you wish to create. Does your chosen spot have enough room for skaters to glide freely?
Think about the surface too. A flat, level area is crucial for maintaining a consistent ice thickness. Uneven surfaces can lead to melting or cracking, disrupting your winter wonderland.
Remember, your rink will be the centerpiece of your outdoor holiday décor. A spot visible from your house or street will enhance the festive ambiance for everyone.
Considering Safety Factors
Safety should be at the forefront of your planning. Check the surroundings for potential hazards. Are there any nearby obstacles, like trees or furniture, that could pose a risk to skaters?
Ensure there’s ample space around the rink for spectators and skaters to move safely. Accessibility is key, especially if children or elderly guests will be enjoying the ice.
Finally, ponder over the lighting situation. Are your Christmas lights positioned to illuminate the rink effectively, enhancing safety while adding to the festive glow?
Choosing the perfect location is more than just a practical decision; it’s about creating a joyful and safe skating experience. Where will your holiday memories be made this year?
Gathering Materials And Tools
Gathering the right materials and tools is key to creating a stunning ice rink with Christmas lights. This step sets the foundation for a beautiful and safe decoration. Choosing the correct items ensures smooth installation and lasting results. Prepare everything before starting to avoid interruptions.
Selecting Christmas Lights
Pick lights that can handle cold temperatures and outdoor use. LED lights are energy-efficient and last longer. Choose colors that match your theme—classic white or multicolor are popular choices. Consider the length and style of the light strands to fit your rink size. Waterproof lights prevent damage from snow or moisture.
Essential Tools And Supplies
- Extension cords rated for outdoor use
- Zip ties or clips to secure lights
- Power strips with surge protection
- Measuring tape to plan layout
- Outdoor timers for automatic lighting control
- Protective gloves for safe handling
- Step ladder for reaching high spots
Building The Ice Rink Frame
Building a solid frame for your ice rink is crucial to creating a smooth, safe surface that holds up well throughout the season. The frame acts as the foundation, keeping the water contained as it freezes into ice. Taking time to design and construct it carefully will save you from leaks and uneven edges that can spoil your rink experience.
Designing The Layout
Start by deciding the size and shape of your ice rink based on the space you have available. Measure the area accurately and mark the boundaries with stakes or spray paint. Think about how much room you want for skating and whether you need extra space for lights or decorations around the edges.
Consider if you want a simple rectangle or a more creative shape. Keep in mind that sharper corners and unusual angles might be harder to build and freeze evenly. Ask yourself: will this layout fit well in my yard and look good with the Christmas lights I plan to use?
Constructing The Border
The border holds the water in place until it freezes, so it needs to be sturdy and watertight. Use materials like plywood, 2×4 lumber, or plastic panels to create a solid frame. Secure the corners tightly with screws or brackets to prevent leaks.
Line the inside of the frame with a heavy-duty plastic liner or pond liner to stop water from seeping out. Overlap the liner edges outside the frame and weigh them down with bricks or boards. This step was a game changer for me; without a good liner, water quickly found its way through small gaps.
Make sure the frame is level by checking with a spirit level or a simple water level tool. An uneven frame means uneven ice, which can be frustrating when you’re trying to skate. Would you want to skate on a bumpy surface that spoils your holiday fun?
Credit: www.youtube.com
Setting Up The Ice Surface
Setting up the ice surface is the heart of creating a magical ice rink decorated with Christmas lights. The process requires patience and attention to detail to ensure a smooth, clear ice layer that will shine beautifully under your festive lighting. Let’s break down the steps to get your rink ready for both skating fun and dazzling decoration.
Preparing The Base Layer
Start by choosing a flat, level area outdoors that can safely hold water without leaking. Clear the ground of any debris like leaves, sticks, or rocks that could create bumps or holes in the ice.
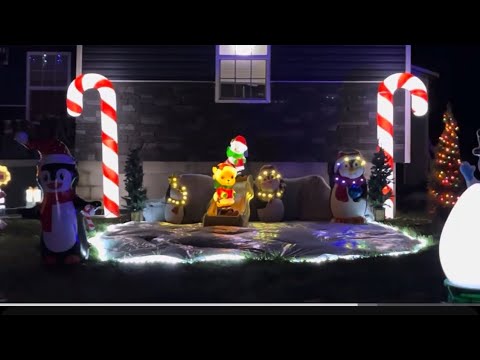
Lay down a plastic tarp or heavy-duty polyethylene sheet to prevent water from seeping into the ground and to protect the ice surface. Secure the edges with weights or stakes to keep it in place during the freezing process.
Think about the thickness you want for your ice. A base layer of about 1 to 2 inches is a good start to ensure durability. This base will support the upper layers and keep your rink safe for skating or just as a stunning display.
Pouring And Freezing Water
Use a watering can or hose with a spray nozzle to pour water gently over the base layer. Pour in thin layers—about half an inch at a time—to avoid cracks and bubbles.
Allow each layer to freeze completely before adding the next one. This might take several hours depending on the temperature, so patience is key.
Wondering how to speed up the freezing process? Try flooding the rink in the early evening when temperatures start to drop. The cold night air helps the water freeze faster and more evenly.
Repeat this layering process until your ice reaches the desired thickness, usually around 4 to 6 inches for safe skating. Keep the surface smooth and watch for any rough spots that might need filling in later.
Installing Christmas Lights
Installing Christmas lights around your ice rink creates a magical and festive atmosphere. Proper placement of lights enhances the rink’s charm and visibility. Safety is crucial when working with electrical decorations outdoors.
Arranging Lights Around The Rink
Start by deciding the style of lighting for your rink. Outline the rink edges with bright, colorful lights to define its shape. Use waterproof LED string lights for durability and brightness. Space the lights evenly for a neat appearance.
Consider wrapping lights around posts or fence posts near the rink. Hang icicle-style lights from nearby trees or structures to add sparkle. Use clips or hooks to secure the lights firmly without damaging surfaces.
Plan your lighting to avoid dark spots or overly bright areas. Combine different light colors or styles for a festive look. Keep the design simple to maintain a clean and inviting rink.
Ensuring Safe Electrical Connections
Choose outdoor-rated extension cords and light strings to prevent electrical hazards. Connect lights to a ground fault circuit interrupter (GFCI) outlet to reduce shock risk. Avoid overloading outlets by checking the wattage limits of your lights and cords.
Keep all plugs and connections off the ice and away from water puddles. Use waterproof electrical tape on connectors to guard against moisture. Regularly inspect cords for damage or fraying before use.
Turn off the lights when not in use to prevent overheating. Store unused lights in a dry place after the season. Proper care ensures safe and long-lasting decorations around your ice rink.
Adding Decorative Touches
Adding decorative touches to your ice rink with Christmas lights transforms it from a simple setup into a magical winter wonderland. These details bring warmth and personality to the chilly environment, making your rink inviting and memorable. Think beyond just lights; focus on how different elements interact to create a festive vibe that guests will love.
Incorporating Themed Decorations
Themed decorations help tie your ice rink’s look together. Choose a holiday motif like classic red and green, frosty winter whites, or even a playful candy cane theme to guide your decor choices.
Try adding:
- Miniature Christmas trees lined along the rink edges
- Snowflake ornaments hanging from nearby trees or poles
- Festive garlands wrapped around railings
- Santa or reindeer figurines placed strategically for fun photo spots
I once added glittery icicle decorations to my rink, and it instantly made the space feel more enchanted. What simple themed item could you add that fits your style and space?
Using Light Effects For Ambiance
Lights do more than just illuminate—they set the mood. Use different types of Christmas lights like twinkling fairy lights, steady LED strips, or color-changing bulbs to create layers of ambiance.
Consider these ideas:
- Wrap soft white lights around nearby trees for a glowing backdrop
- Place spotlights with colored gels to cast festive hues across the ice
- Add synchronized light sequences that change with music for an interactive experience
Playing with light effects can turn your rink into a cozy, magical spot even on the coldest nights. How can you use lighting to highlight your rink’s best features?
Maintaining The Ice Rink
Maintaining the ice rink is essential to keep it safe and enjoyable. Consistent care ensures the ice stays smooth and the lights shine bright. Regular checks prevent damage and prolong the rink’s life. This section focuses on key steps to maintain both ice and decorations.
Keeping The Ice Smooth
Clear snow and debris from the ice surface daily. Use a shovel or broom designed for ice rinks. Fill any cracks or holes with a thin layer of water. Let it freeze completely before use. Avoid sharp objects on the ice to prevent scratches. Regularly spray water to create a fresh, smooth layer. This keeps the surface safe for skating and improves appearance.
Handling Light Maintenance
Check Christmas lights regularly for any damage or outages. Replace broken bulbs promptly to maintain full brightness. Keep wires away from water to prevent electrical hazards. Secure lights firmly to avoid them falling or tangling. Use waterproof lights designed for outdoor use. Store lights carefully after the season to avoid tangles and damage. Proper light care enhances the festive feel and ensures safety.
Credit: styleblueprint.com
Credit: www.visitpa.com
Frequently Asked Questions
How Do Christmas Lights Enhance An Ice Rink Decoration?
Christmas lights add sparkle and warmth to the ice rink. They create a festive, magical atmosphere perfect for holiday celebrations. Lights highlight rink edges and pathways, improving safety and visual appeal. Using colorful or white lights can match any holiday theme.
They transform a simple rink into a stunning centerpiece.
What Materials Are Needed To Make A Lighted Ice Rink?
You need an ice rink kit or a flat surface, Christmas lights, extension cords, and stakes or clips. Waterproof and outdoor-rated lights ensure safety. A power source nearby is essential. Optionally, use light timers for automated control. These materials help create a safe, glowing ice rink space.
Can I Use Any Christmas Lights Outdoors On The Rink?
Only use outdoor-rated, waterproof Christmas lights for safety. Indoor lights may cause electrical hazards or fail in wet conditions. LED lights are energy-efficient and last longer outdoors. Check packaging for outdoor use approval before installation. Proper lights ensure durability and a safe, festive environment.
How Do I Safely Install Lights Around An Ice Rink?
Secure lights with stakes or clips away from the ice surface. Avoid placing cords where skaters can trip. Use waterproof extension cords and connect them to ground-fault circuit interrupter (GFCI) outlets. Regularly check lights and connections for damage. Proper installation prevents accidents and electrical hazards.
Conclusion
Creating an ice rink with Christmas lights adds magic to any space. It brings warmth and joy during cold nights. You can enjoy skating under sparkling lights with friends and family. The steps are simple and fun to follow. Use safe materials and check the weather often.
This decoration brightens your home and creates lasting memories. Try it this holiday season and watch your yard come alive. A glowing ice rink makes winter moments special and bright.