Are you looking for a simple way to refresh your walls without spending a fortune? Making your own wall decor stickers could be the perfect solution.
Imagine turning plain walls into stunning art pieces that reflect your style—all with a few easy steps. In this guide, you’ll discover how to create beautiful, custom stickers that stick perfectly and last long. Ready to transform your space and impress everyone who visits?
Keep reading, and you’ll be surprised at how fun and rewarding this DIY project can be.

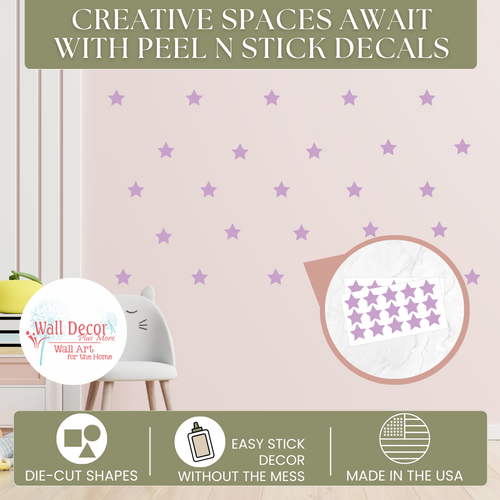
Credit: maminka.co.uk
Materials Needed
Creating wall decor stickers is simple with the right materials. Good preparation makes the process smooth and enjoyable. Gather all necessary items before starting. This saves time and avoids frustration. Below are the key materials needed for making wall decor stickers.
Choosing The Right Vinyl
Select vinyl that sticks well to walls and removes cleanly. Look for adhesive vinyl made for indoor use. Matte vinyl reduces glare and looks professional. Glossy vinyl offers a shiny finish but can reflect light. Pick vinyl sheets that match your design size and color needs.
Essential Tools
- Cutting machine or sharp craft knife for precise shapes
- Cutting mat to protect your surface
- Transfer tape to move stickers without damage
- Ruler and pencil for measuring and marking
- Squeegee or credit card to smooth out air bubbles
- Scissors for trimming small details
Optional Decorative Elements
Add extra touches to personalize your stickers. Use glitter vinyl for sparkle effects. Metallic vinyl adds a shiny, eye-catching look. Paint pens can highlight details after cutting. Stencils help create layered designs. These extras make your wall art unique.

Credit: www.amazon.com
Designing Your Stickers
Creating your own wall decor stickers can be a fun and rewarding process. Designing your stickers allows you to express your creativity and personalize your space. Whether you prefer simple designs or more intricate patterns, the design phase is where your ideas come to life. Let’s explore some design tips and tools to help you craft unique wall decor stickers.
Simple Design Ideas
Simple designs are often the most striking. Think of geometric shapes, abstract patterns, or silhouettes. These can be easy to create and look great on any wall. Start with basic shapes like circles, triangles, or squares. Combine them to form interesting patterns. Use your favorite colors to make them pop.
Another idea is to use text. Short quotes or words can make a statement. Choose a font that matches your room’s style. Ensure the text is clear and legible from a distance.
Using Design Software
Design software can help you bring your sticker ideas to life. Programs like Adobe Illustrator or Canva are popular choices. These tools offer templates and design elements. Use them to experiment with different styles and layouts.
Start by sketching your idea on paper. Transfer it to digital format using your chosen software. Play with colors, sizes, and fonts. Adjust until you find a design that fits your vision.
Customizing For Your Space
Customization is key for personalizing your stickers. Consider the room’s theme and color scheme. Choose designs that complement existing decor. Think about the size of the wall where stickers will be placed.
If your space is small, opt for smaller designs. Larger areas can accommodate bigger patterns. Experiment with different arrangements. Try placing stickers at varying heights or angles.
Reflect on the room’s function. A child’s room may benefit from playful designs. A living room might call for more sophisticated patterns. Tailor your stickers to enhance the room’s atmosphere.
Cutting Techniques
Cutting techniques play a vital role in creating neat and attractive wall decor stickers. The way you cut the material affects the final look and ease of application. Choosing the right cutting method depends on the tools available and the design complexity.
Manual Cutting Tips
Manual cutting works well for simple shapes and small projects. Use a sharp craft knife or scissors for precise cuts. Hold the material steady on a flat surface to avoid slips. Cut slowly and follow the design lines closely. For curves, make small, careful snips instead of big cuts. A cutting mat helps protect your workspace and keeps blades sharp longer.
Using A Cutting Machine
Cutting machines offer accuracy and save time on detailed designs. Load your sticker material into the machine and select the design on your computer. Adjust settings for material thickness and blade depth. Machines like Cricut or Silhouette cut smoothly along complex lines. Regularly check blade condition for clean cuts. This method is perfect for multiple stickers or intricate patterns.
Ensuring Clean Edges
Clean edges make stickers look professional and easy to peel. After cutting, gently remove extra material around the design. Use a weeding tool for small inner cuts or details. Lightly sanding edges with fine sandpaper can smooth rough spots. Avoid tearing by peeling stickers slowly and evenly. Proper cutting and finishing guarantee polished, durable wall decor stickers.
Applying Transfer Tape
Applying transfer tape is an important step in making wall decor stickers. It helps move the sticker from its backing to the wall without damage. The right technique makes sure the design stays intact and looks great on your wall. This section guides you through choosing the best transfer tape and applying it smoothly.
Choosing Transfer Tape
Choose transfer tape that fits your sticker size and type. Clear transfer tape works well for detailed designs. It lets you see the sticker under it clearly. Look for tape with a medium tack level. Too sticky tape can damage the sticker. Too weak tape may not hold the design properly.
Proper Application Steps
- Cut a piece of transfer tape slightly larger than your sticker.
- Peel the backing off the tape carefully.
- Place the sticky side of the tape over the sticker.
- Use a squeegee or credit card to press the tape firmly.
- Start from the center and move outwards to avoid wrinkles.
- Slowly peel the sticker with tape off its original backing.
- Position the sticker on the wall and press down firmly.
- Remove the transfer tape gently, leaving the sticker on the surface.
Avoiding Air Bubbles
Air bubbles can ruin the look of your wall sticker. Smooth the transfer tape carefully with a flat tool. Apply pressure evenly across the entire sticker. Work slowly to push out trapped air. If bubbles appear, gently lift the tape and press again. Small bubbles may disappear over time. For large bubbles, use a pin to release the air.
Preparing The Wall
Getting your wall ready is the most important part before applying wall decor stickers. If the surface isn’t properly prepared, the stickers might peel off or not stick well at all. Taking the time to prepare your wall can save you from frustration and help your decor last longer.
Cleaning The Surface
Start by removing dust, dirt, and grease from the wall. Use a mild soap solution and a soft cloth to gently wipe the area where you want to place your stickers.
Rinse with clean water and let it dry completely. A clean surface ensures the adhesive sticks properly and avoids bubbles or peeling later.
Repairing Imperfections
Look closely for cracks, holes, or bumps on your wall. These imperfections can cause your stickers to lift or wrinkle.
Use a filler or spackling paste to smooth out these areas. After it dries, sand the spot lightly to create an even surface.
Have you noticed how even small dents can affect sticker placement? Fixing them first makes a big difference.
Choosing The Best Wall Type
Not all walls are created equal when it comes to sticking decals. Smooth, painted walls usually offer the best surface for stickers to adhere.
Textured walls, wallpaper, or freshly painted surfaces might require extra care or even different types of stickers.
If your wall has a glossy finish, test a small sticker piece first to see how well it sticks. Knowing your wall type helps you choose the right product and method for application.
Installing Wall Stickers
Installing wall stickers might seem simple, but getting it right takes attention and patience. The way you position, apply, and smooth your design affects how it looks and lasts on your wall. Let’s break down these key steps so your wall stickers stick perfectly and brighten your space.
Aligning Your Design
Start by planning exactly where your sticker will go. Use a pencil and a level to mark light guide lines on the wall. This helps you avoid crooked or uneven placement, which can be frustrating to fix later.
Think about the height and spacing relative to other decor in the room. Take a step back and imagine how it will look from different angles. If your sticker comes in multiple pieces, arrange them on the floor first to visualize the final layout.
Applying With Care
Peel the backing slowly and avoid touching the sticky side too much to keep it clean. Hold the sticker by the edges and start applying from one corner or side, pressing gently against the wall.
Don’t rush this part. If you notice air bubbles or misalignment, carefully lift the sticker back up and reposition it. A steady hand makes a big difference in avoiding wrinkles or tears.
Smoothing And Securing
Once your sticker is on the wall, use a flat tool like a credit card or a squeegee to smooth it out. Move from the center outward to push out any air bubbles or wrinkles.
Apply firm, even pressure to make sure the sticker adheres well, especially around edges and corners. Check your work by running your fingers over the surface—does it feel secure and flat? If not, smooth again until it’s perfect.
Maintaining Your Wall Decor
Maintaining your wall decor stickers keeps them fresh and beautiful longer. Proper care protects your designs from damage and fading. Simple habits can help your stickers stay bright and smooth on the wall.
Cleaning Tips
Dust your wall decor regularly using a soft cloth or duster. Avoid harsh chemicals that can damage the sticker surface. Use a damp cloth with mild soap for gentle cleaning. Pat dry carefully to prevent moisture damage. Keep the area free from sticky residues and dirt.
Preventing Peeling
Ensure the wall surface is clean before applying stickers to avoid peeling. Avoid touching the edges often, as oils from hands can weaken adhesion. Keep the room temperature stable to prevent glue from loosening. Avoid placing stickers near heat sources or in humid areas. Press edges firmly during installation to secure them well.
Refreshing Your Design
Replace damaged or faded stickers to refresh your wall’s look. Use new stickers to add extra patterns or colors around old ones. Peel off old stickers slowly to avoid wall damage. Rearrange stickers for a fresh design without repainting. Small changes can make your decor feel new again.
Credit: vyoletshop.com
Creative Ideas To Try
Creative ideas can make your wall decor stickers stand out. Experimenting with different styles brings life to plain walls. Using simple techniques can create eye-catching designs. Explore these ideas to add personality and charm to your space.
Mixing Textures And Colors
Combine smooth and rough sticker surfaces for a unique look. Use matte and glossy finishes side by side. Choose colors that contrast well to catch attention. Soft pastels paired with bold shades create balance. Try metallic stickers with soft fabric-like textures for depth. This mix adds richness and interest to your walls.
Layering Stickers
Place smaller stickers on top of larger ones to create dimension. Overlap shapes carefully to avoid clutter. Use transparent stickers over solid ones for a cool effect. Layering adds depth and makes designs pop. This technique works well for floral or geometric themes.
Seasonal And Themed Decor
Change your wall stickers to match seasons or holidays. Use autumn leaves or snowflakes for a festive touch. Create themes like ocean, forest, or cityscape with related stickers. Seasonal changes keep your space fresh and lively. Themed decor helps tell a story on your walls.
Frequently Asked Questions
What Materials Are Needed To Make Wall Decor Stickers?
To make wall decor stickers, you need adhesive vinyl sheets, a cutting tool, transfer tape, and a design template. These materials help create durable and easy-to-apply stickers for walls. Quality materials ensure your stickers last and look professional.
How Do I Prepare The Wall For Sticker Application?
Clean the wall with soap and water, then dry it completely. Ensure the surface is smooth and free of dust or grease. Proper preparation helps stickers adhere better and last longer without peeling.
Can I Reuse Wall Decor Stickers Once Removed?
Most wall decor stickers are designed for one-time use. Removing them usually damages the adhesive, making reuse difficult. However, some high-quality vinyl stickers may be repositioned carefully, but this is not guaranteed.
How Long Do Diy Wall Decor Stickers Last?
DIY wall decor stickers typically last from 3 to 5 years indoors. Longevity depends on the quality of materials, wall surface, and environmental factors like sunlight and humidity.
Conclusion
Making wall decor stickers is simple and fun. You need only a few materials to start. Choose designs that fit your style and space. Cut carefully and use a good adhesive for best results. These stickers can brighten any room quickly.
Try different shapes and colors to create a unique look. Enjoy the process and personalize your walls easily. This project suits all skill levels and budgets. Give your home a fresh, creative touch today.