Imagine turning heads wherever you go with a dazzling decoration that lights up as you move. You don’t need to be a tech expert or have expensive tools to create something truly eye-catching.
What if you could make your own wearable light-up decoration that’s unique, fun, and perfect for parties, festivals, or just standing out in a crowd? In this guide, you’ll discover simple steps and clever tips to bring your creative idea to life.
Ready to shine brighter than ever before? Let’s get started!
Materials Needed
Gathering the right materials is essential for making a wearable light-up decoration. Selecting suitable components ensures your project is safe, bright, and comfortable to wear. Focus on lightweight and flexible items to maintain ease of movement. Choose durable parts to last through multiple uses.
Below are the main categories of materials needed to create your glowing accessory.
Types Of Lights
- LED string lights: Small, flexible, and energy-efficient
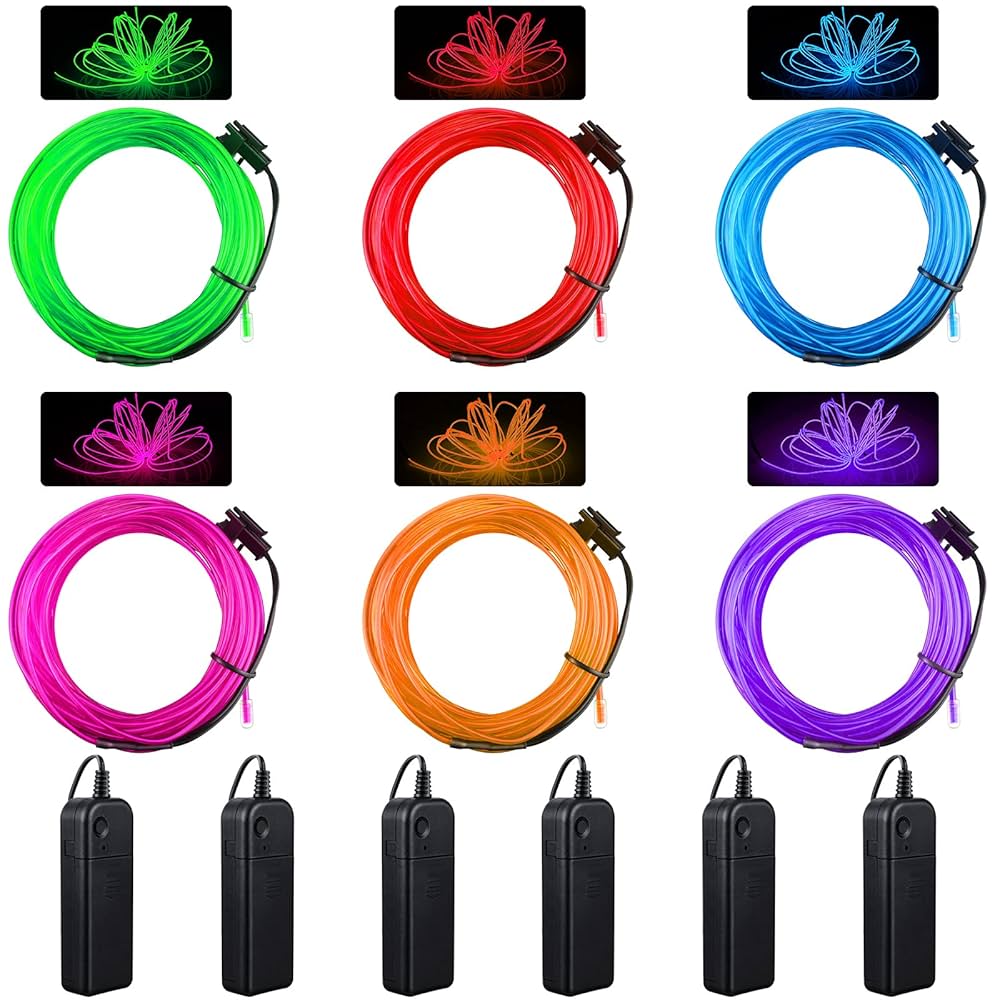
- EL wire: Thin, flexible, and glows evenly
- Fairy lights: Delicate and perfect for subtle glow
- Battery-operated mini lights: Portable and easy to hide
Power Sources
- Coin cell batteries: Compact and lightweight
- AA or AAA batteries: Higher power for brighter lights
- Rechargeable battery packs: Eco-friendly and reusable
- USB power banks: Useful for longer wear time
Decorative Elements
- Fabric: Soft base for attaching lights
- Glow-in-the-dark paint: Adds extra brightness
- Sequins and beads: Enhance sparkle and style
- Colored tape or ribbons: Hide wires and add flair
Tools Required
- Hot glue gun: Secure lights and decorations
- Scissors: Cut fabric and wires easily
- Sewing needle and thread: Attach components firmly
- Wire cutters: Trim light wires safely
- Electrical tape: Insulate and protect connections
Choosing Your Design
Choosing the right design for your wearable light-up decoration is crucial to ensure it stands out. It’s not just about the aesthetics; your design needs to be practical and functional. Consider what message you want your decoration to convey and how it reflects your personality.
Simple Patterns
Simple patterns are a great starting point for beginners. Think about straightforward shapes like stars, hearts, or circles. These are easy to create and can be very effective.
- Use LED strips or small bulbs to outline these shapes.
- Choose colors that contrast well with your clothing for maximum visibility.
Have you ever noticed how a simple heart design can instantly grab attention? It’s because simplicity often speaks louder than complexity.
Themed Decorations
Themed decorations offer a chance to showcase your creativity. Whether it’s a holiday theme or a personal interest, themed designs can make your wearable decoration unique.
- Plan your design around events like Halloween or Christmas for seasonal flair.
- Consider using character shapes or symbols that resonate with you.
Imagine wearing a snowflake design during winter festivities. It not only lights up beautifully but also complements the seasonal ambiance.
Wearable Placement Ideas
Placement is key to making your design pop. Think about where you can place your lights to make the biggest impact.
- Consider placing lights around the hem of a skirt or the edges of a jacket.
- Use strategic placement to highlight parts of your outfit, like collars or cuffs.
Have you tried placing lights around the edges of a hat? It’s a simple trick that transforms your accessory into a glowing statement piece.
Preparing The Base
Preparing the base is a crucial step in making your wearable light-up decoration both comfortable and durable. A well-prepared base supports the lights and electronics while ensuring you can wear your creation with ease. Let’s break down how to create a solid foundation that holds everything together perfectly.
Selecting Fabric Or Accessories
Choose fabric or accessories that are lightweight but sturdy enough to hold the lights and wiring. Cotton, felt, or denim work well because they provide a good balance between flexibility and support. Avoid slippery or stretchy materials, as they can make attaching components tricky and unstable.
Think about the style you want too. Are you aiming for a headband, vest, or necklace? Accessories like ribbons, hats, or mesh can serve as creative bases. When I made my first light-up costume, I found a plain denim jacket perfect because it was strong and easy to sew through.
Measuring And Cutting
Measure carefully to ensure the base fits comfortably and supports your design. Use a tape measure to mark where the lights and battery pack will go. Don’t forget to leave extra space for seams and wiring paths.
Cut your fabric or accessory with sharp scissors to get clean edges that won’t fray easily. If your material tends to unravel, consider using fabric glue or a quick zigzag stitch on the edges. Have you ever struggled with too-short wiring? Planning your cuts with wiring length in mind saves a lot of headaches.
Creating A Stable Base
Stability is key for wearable decorations that light up. Add layers if the fabric is too thin, or reinforce the back with interfacing or a lightweight plastic sheet. This prevents sagging and keeps everything in place.
Sew or glue small pockets or loops where you can tuck wires and secure batteries. This keeps the wiring neat and prevents discomfort while wearing. When I added these little pockets to my design, the lights stayed perfectly aligned, and I could move freely without worrying about damage.

Credit: www.tiktok.com
Installing Lights
Installing lights on your wearable decoration is where the magic begins. This step brings your design to life and lets you control how your creation shines. Getting the lights in place neatly and securely ensures your wearable stays comfortable and functional.
Attaching Led Strips
LED strips are flexible and easy to shape, making them perfect for wearable decorations. Peel off the backing tape and press the strip firmly onto the fabric or surface you want to light up. Choose spots that won’t bend too much to avoid damaging the LEDs.
Think about how the lights will flow with your design—do you want them outlining a shape or scattered like stars? Testing the strip’s power before attaching helps you avoid surprises later.
Sewing Or Gluing Components
Deciding between sewing and gluing depends on your materials and how sturdy you want the connection. Sewing offers a secure hold and is best for fabrics that can handle needlework without damage. Use clear thread or fishing line to keep stitches discreet.
If you’re using glue, pick a flexible, fabric-friendly adhesive that won’t stiffen your wearable. Apply small dots rather than large blobs to keep the fabric breathable. Have you tried both methods on different projects? You might find a combo works best for your design.
Securing Wires
Loose wires can snag or pull, so securing them is crucial. Use small stitches or fabric tape to anchor wires along seams or under folds. Avoid tight bends to prevent wire breakage.
Consider routing wires along less visible areas to keep your wearable looking sleek. What clever tricks have you used to hide wires on your projects? Sharing those ideas could inspire your next creation.
Power Setup
Setting up the power system for your wearable light-up decoration is crucial for both function and comfort. You want your lights to shine bright without weighing you down or making the setup complicated. The power setup includes installing the battery pack, placing the switch in an easy-to-reach spot, and following safety guidelines to keep everything running smoothly.
Battery Pack Installation
Choose a lightweight battery pack that matches your light strip’s voltage requirements. I found that small rechargeable battery packs are perfect for wearable projects—they last long and don’t add bulk.
Secure the battery pack in a spot where it won’t move around, like inside a pocket or sewn into a fabric pouch. Use Velcro strips or small elastic bands to keep it snug but accessible for charging or replacement.
Switch Placement
Position the switch where you can easily reach it without removing your decoration. A common place is near your wrist or on the strap of your accessory.
Try testing different spots before finalizing. I once placed a switch on a sleeve, but it was hard to find in low light, so moving it to the cuff made turning the lights on and off effortless.
Safety Tips
Make sure all wires and connections are insulated to avoid short circuits. Use electrical tape or heat-shrink tubing to cover exposed wiring.
Never overload your battery pack; check the current draw of your LEDs and match it to your power source. Also, avoid placing batteries near heat or water to prevent accidents.
Have you checked your setup’s comfort and safety before wearing it out? Small adjustments can make a big difference in your wearable’s reliability and your peace of mind.

Credit: www.amazon.com
Adding Decorative Touches
Adding decorative touches to your wearable light-up decoration transforms a simple project into a personal statement. These details catch eyes and create a unique vibe that matches your style. Let’s look at some easy ways to boost the look of your wearable lights.
Using Reflective Materials
Reflective materials bounce light back, making your decoration shine even brighter. Think about adding strips of reflective tape or small mirrored pieces around your lights. These materials don’t just enhance visibility—they add a futuristic, edgy feel to your design.
I once added reflective fabric to a light-up jacket for a night event. The effect was stunning—the jacket seemed to glow even more when light hit it. What reflective elements could you add that fit your style and outfit?
Incorporating Colors
Color changes the mood of your wearable decoration instantly. Use colored LEDs or attach tinted plastic covers over the lights for a vibrant effect. Mixing colors can highlight different parts of your design and make it stand out in the crowd.
Try pairing complementary colors like blue and orange or go monochrome with different shades of one color. How would different colors express your personality or fit the event you’re attending?
Personalizing Your Design
Personal touches make your wearable light-up decoration truly yours. Add patches, charms, or fabric paint around your lights to tell a story or showcase your interests. These small elements keep your decoration from looking generic.
Once, I added tiny LED-lit buttons shaped like stars to my design, reflecting my love for astronomy. It sparked conversations and made my piece memorable. What personal symbols or themes could you include to make your design unforgettable?
Testing And Troubleshooting
Testing and troubleshooting are vital steps in creating wearable light-up decorations. They ensure your design works perfectly and shines bright. Skipping these steps can lead to dim lights or complete failure. Careful checks help find and fix problems early. This saves time and materials. Let’s explore how to test your wearable lights effectively and solve common issues.
Checking Connections
Loose or broken connections cause most light-up issues. Inspect all wires and solder points. Make sure wires are firmly attached. Check for exposed wires that could short circuit. Use a multimeter to test continuity. Look for corrosion or damage in connectors. Re-seat any plug-in parts. A solid connection is key to proper function.
Replacing Faulty Components
Faulty parts can stop lights from working. Identify damaged LEDs, resistors, or batteries. Test each component separately with a simple circuit. Swap out any part that does not light or match expected values. Use components with the same specifications. Keep extra parts on hand for quick replacements. Reliable components ensure consistent glow and safety.
Optimizing Brightness
Brightness affects the decoration’s visual impact. Adjust resistor values to control LED brightness safely. Use a resistor calculator to find the right size. Check battery voltage and replace weak batteries. Position LEDs for the best light spread. Avoid overcrowding LEDs to reduce heat buildup. Balanced brightness makes your wearable decoration look stunning and lasts longer.
Care And Maintenance
Taking good care of your wearable light up decoration ensures it stays bright and functional for a long time. Proper maintenance not only protects the delicate electronics but also keeps your creation looking fresh and impressive every time you wear it. Let’s dive into some practical tips that make caring for your glowing accessory easy and effective.
Cleaning Tips
Cleaning your wearable light up decoration requires a gentle touch to avoid damaging the lights or wiring. Use a soft, damp cloth to wipe down surfaces—never immerse the decoration in water or use harsh chemicals.
If dirt or dust gets stuck in small crevices, a soft brush like a clean makeup brush can help remove it without harm. Be careful around battery compartments and switches to prevent moisture from seeping inside.
Battery Care
Battery health is crucial for keeping your wearable lights shining bright. Always remove batteries if you don’t plan to use the decoration for a while to prevent leaks and corrosion.
Use fresh batteries and avoid mixing old and new ones, as this can cause uneven power and damage the circuit. Do you notice your lights dimming quickly? It might be time to replace the batteries or check for loose connections.
Storage Recommendations
Storing your light up decoration properly can save you headaches later. Keep it in a cool, dry place away from direct sunlight to avoid fading and heat damage.
Wrap the decoration loosely in soft cloth or tissue paper to protect wires from bending or breaking. Have you ever grabbed a decoration only to find tangled wires? A simple storage box with compartments can prevent that hassle.

Credit: www.amazon.ca
Frequently Asked Questions
What Materials Are Needed For Wearable Light Up Decoration?
You need LED lights, a power source, conductive thread, fabric, and a switch. Optional items include resistors and a soldering kit for secure connections.
How Do I Safely Connect Leds To Clothing?
Use conductive thread to stitch LEDs onto fabric. Avoid direct soldering on fabric to prevent damage and ensure flexibility.
Can I Wash Wearable Light Up Decorations?
Yes, but only if LEDs and battery packs are removable. Hand wash gently and avoid water contact with electronics.
How Long Does The Battery Last In Wearable Lights?
Battery life depends on LED type and usage. Usually, small coin batteries last 4-8 hours during continuous use.
Conclusion
Creating wearable light-up decorations can be fun and simple. You only need a few basic materials and some creativity. These decorations add a special touch to parties and events. Anyone can make them with a little practice and patience. Try different designs to find what you like best.
Light-up accessories always catch attention and make moments brighter. Start your project today and enjoy the glow you create!